Create your first webinar
Univid is flexible and fast enough to cope with any kind of webinar. Learn how to build your first lobby and start moving work forward.
Build your first webinar in Univid
There is a lot to keep track of in webinars, get registrations on a landing page, involve host/presenters, design and work out the content to present. The objective is to have as many relevant viewers signup, deliver without hickups in the delivery of the content and encrouge the audience to take action or learn more - all while mainting a streamlined process making it sustainable going live again in the future
Univid can help you with every step of the way. With the basics covered of setting up a webinar, it's time to get going.
Create a webinar
Structuring a webinar with all the members, ideas, tasks, and due dates and optimizing it for team collaboration can be overwhelming. Thankfully, Univid automates parts of these aspects upon creating a webinar. While Univid similar to common meeting software like teams and zoom are out of the box ready to share the link and start, the webinar can be configured to meet your needs and be successful.
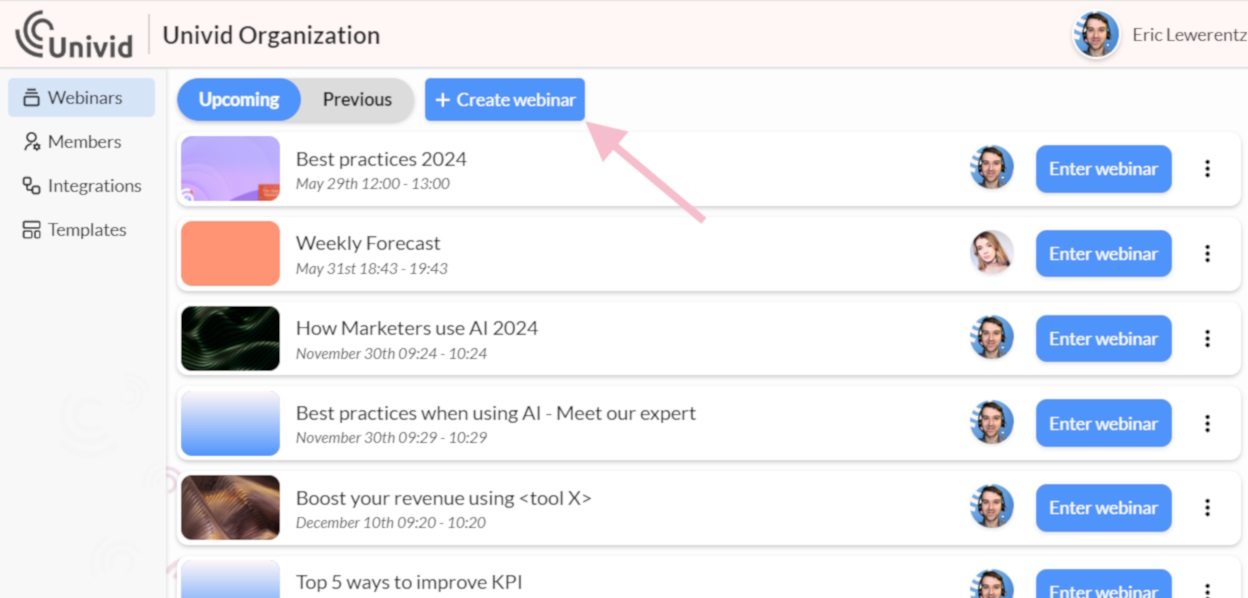
- From the organisations’s Webinar tab, click “Create webinar” or duplicate a webinar by cliking “Enter” on an existing Webinar and from the left side side menu select “Other”, and choose “Duplicate”.
- Name the webinar to represent what it is all about, it should grab their attention and quickly tell them why your webinar is worth their time. Tip from our glossary: Keep it short and sweet.
- Your time zone could be a valuable aspect to consider if your target audience is in another region. As you work through creating a new webinar, you will have options for adjusting this later on.
For more information about the best time to host a webinar, read more here.
Customize your webinar
In most cases no webinar is a like, so why not give each webinar a branded and customized look and feel? In the spirit of branding guidelines and flexibility, we let you customize your webinar lobby to reflect your company’s unique brand identity and to enhance the message of the webinar content.
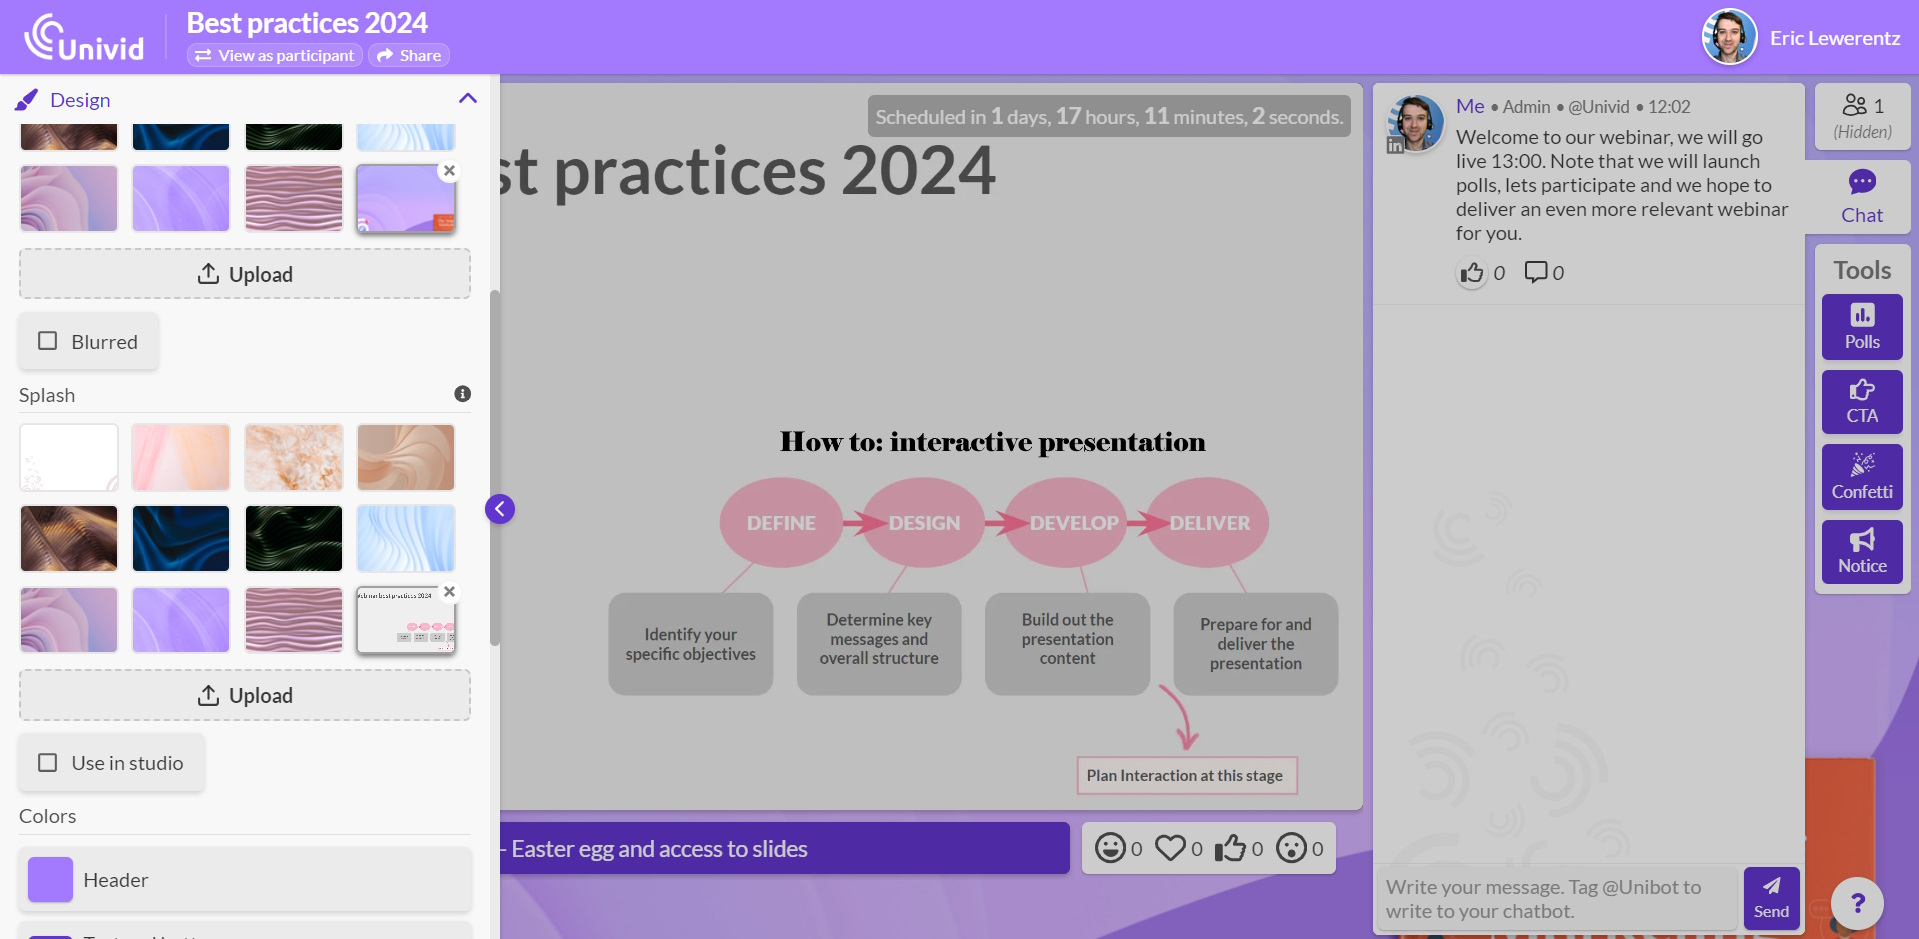
You can adapt both the background and splash image of the webinar lobby, upload your own logo and colors. You can at anytime change splash image or other design - yes even while being live!
Tip: If you want to create a more living and engaging webinar lobby, incorporate real world photage from Unsplash or a branded image.
Start collaborating
Whether a member is going to present or only takes part in the acquisition of registrants, ensuring all team members can contribute and finalize tasks results in a smoother webinar experience.
Invite co-workers and guest speakers so that they can get ready for the webinar.
Recurring member
- 1. Head over to the organisations page, if you are in a webinar, click 'home' at the top in the left menu.
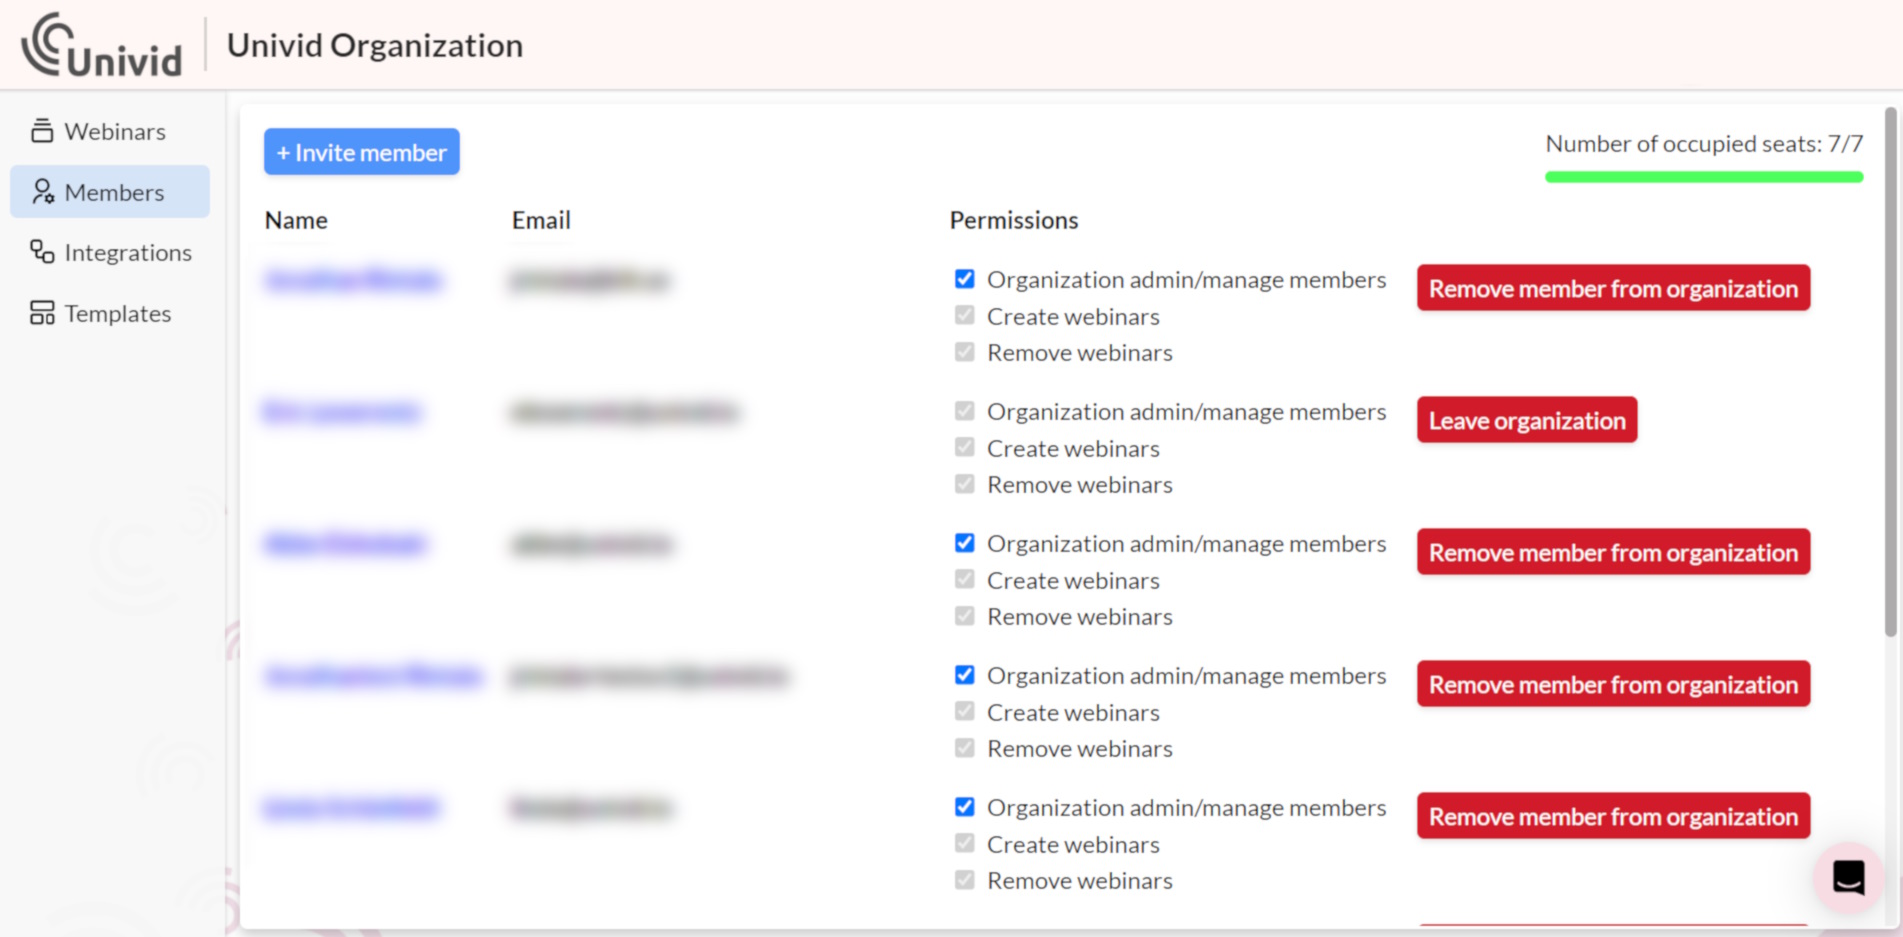
- 2. Navigate to the members section once at the organisations page.
- 3. To send an invitation, enter the email of the co-worker expected to recurringly participate in webinars.
Invite member to webinar
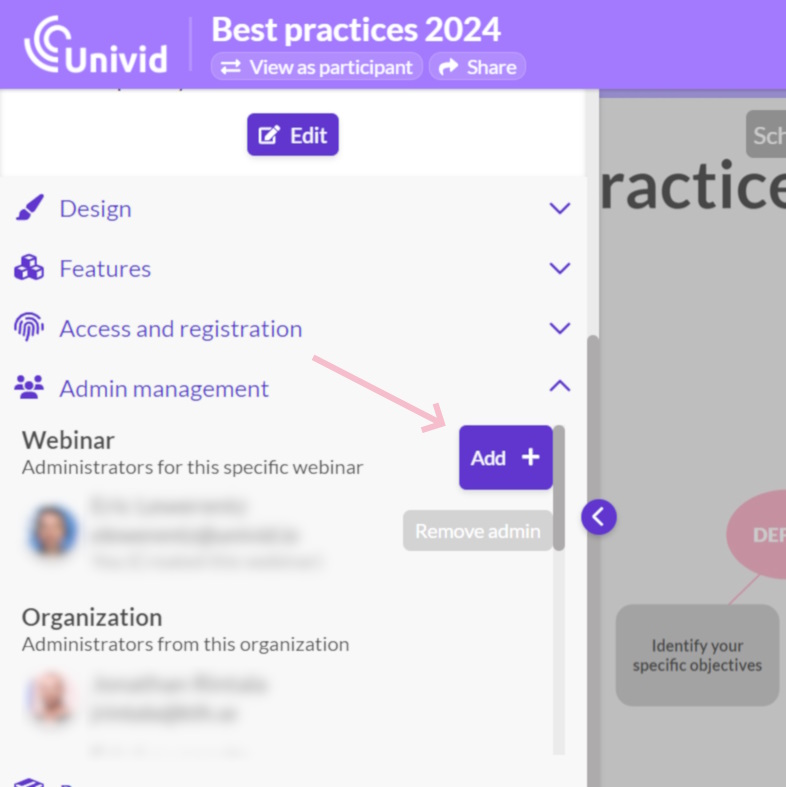
- 1. Within the left menu, click Admin management, click 'home' at the top in the left menu.
- 2. At the Admin management section, there is an easy to share invite link by clicking 'Add'. Drop the admin link in a Slack/Teams channel or email it to external guest speakers to start collaborating.
Assemble the audience
While the Lobby acts as a landing page for registrants before the session begins. One main objective of a webinar is to have an audiance attending. A webinar in Univid automatically gets a registration page (integrations support custom forms). You can view it by opening the link you are on in an incognito webbrowser or by pressing the preview within the left menu. From the left menu, form fields like company name and phone number can be added.
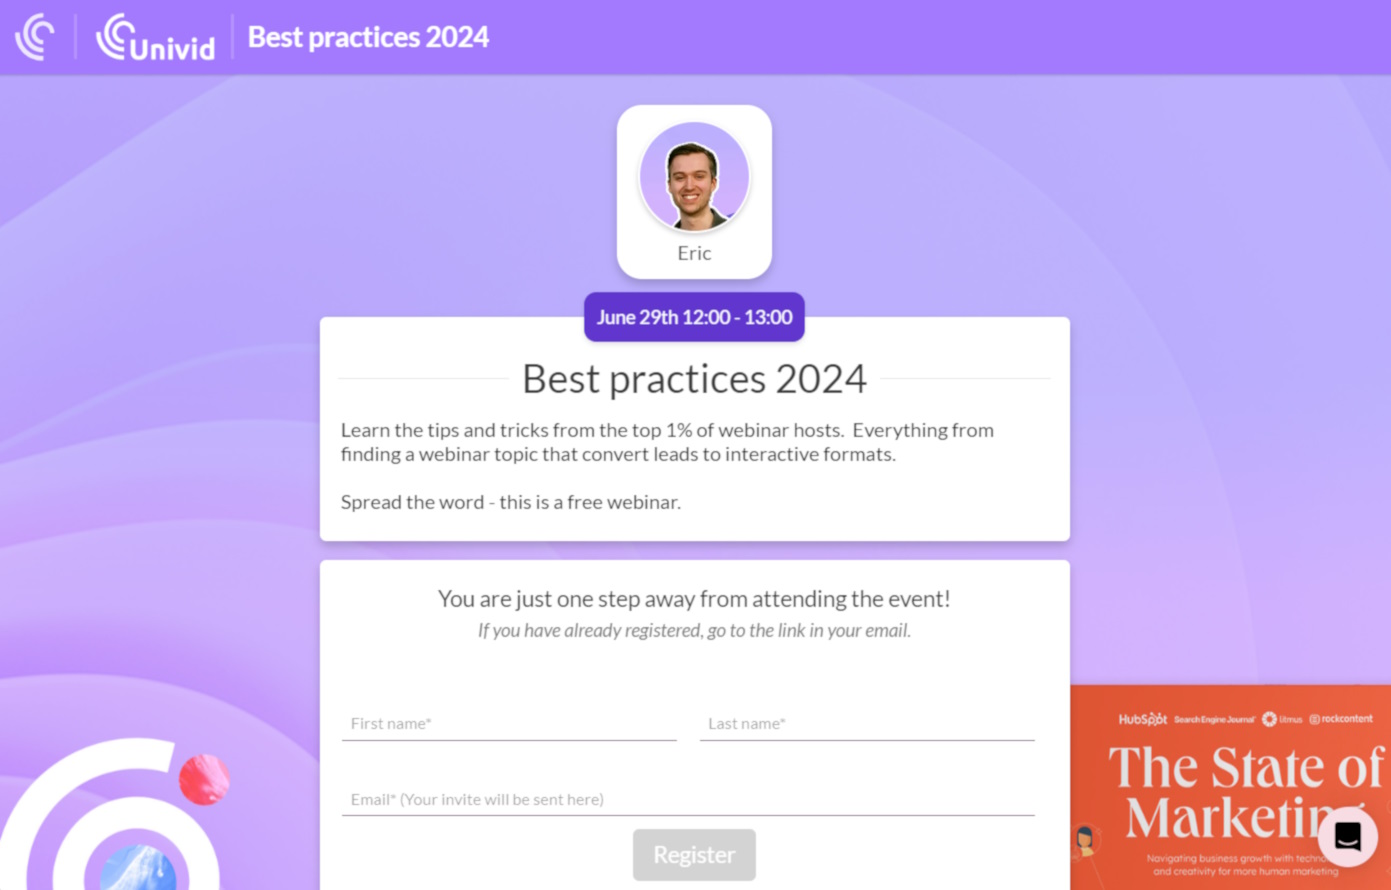
To share the registration link, locate the share button above the lobby of the webinar. Copy and share the link at any channel suitable for your audience, be it newsletter, company homepage or personal email.
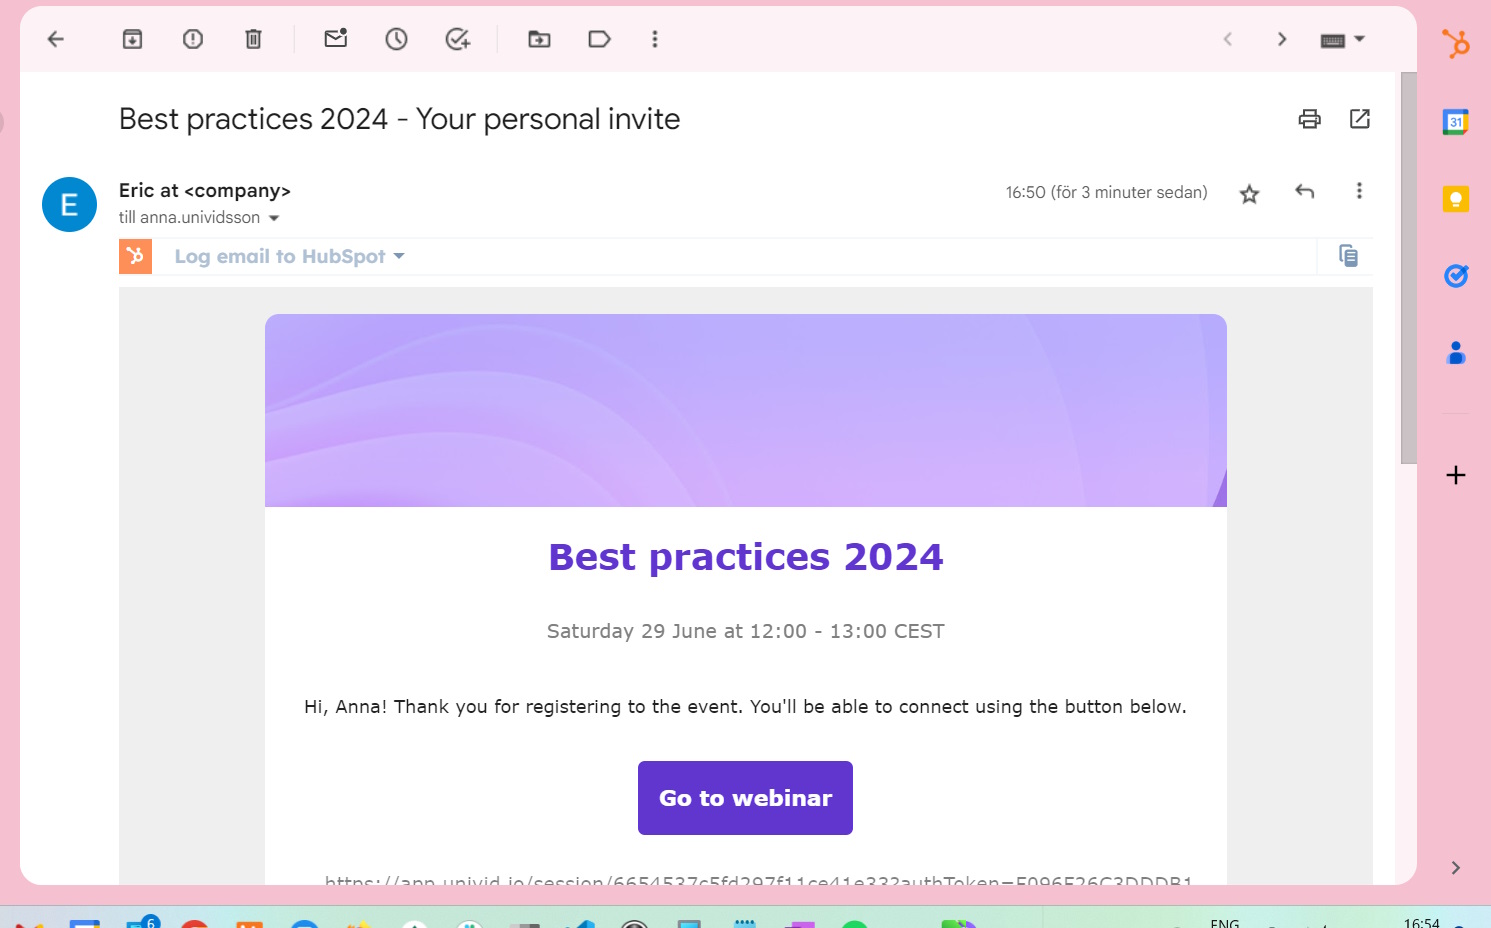
Email with personal link
An easy to access link to the webinar is sent upon registration. This email reflects the design in your webinar and lobby (logo image, background image and colors).
There are also reminder emails sent out. You disable any email to better suit your audience preference.