How to: Use external video camera and mic in webinar
Here is how to use an external video camera and mic in a webinar.

Contents
How to Use External Video and Audio Input in a Webinar
Webinars have become an essential tool for businesses and influencers to connect with their audience, educate, and drive inbound leads.
Using external video and audio inputs can significantly improve the quality of a webinar. Here is how to set up external video and audio input in a webinar.
Step-by-Step Guide to Using External Video and Audio Inputs
1. Choose the Right Equipment
External Camera: Opt for a high-definition webcam or DSLR camera. Popular choices include Logitech BRIO 4K Stream Edition, or Sony Alpha a6000. Often times, a good webcam is good enough - but if you want to go the extra mile and choose a DSLR - you will have to get a capture card as well.
Microphone: Choose a microphone that suits your needs. USB microphones like Blue Yeti, or Rode NT-USB are good options. Or you could go for XLR microphones like Audio-Technica AT2020 (if you have an audio card).
Capture Card: If using a DSLR or other professional camera, you might need a capture card like Elgato Cam Link 4K to connect the camera to your computer.
Learn more about setting up your own webinar studio and the 6 things you need here.
2. Connect Your Equipment
Camera: Connect your external camera to your computer using USB or HDMI (with a capture card if necessary). Ensure the camera is recognized by your operating system first.
Microphone: Plug your microphone into your computer’s USB port or audio interface if using an XLR microphone. Test the connection to ensure the system recognizes the microphone.
3. Configure Your Webinar Software
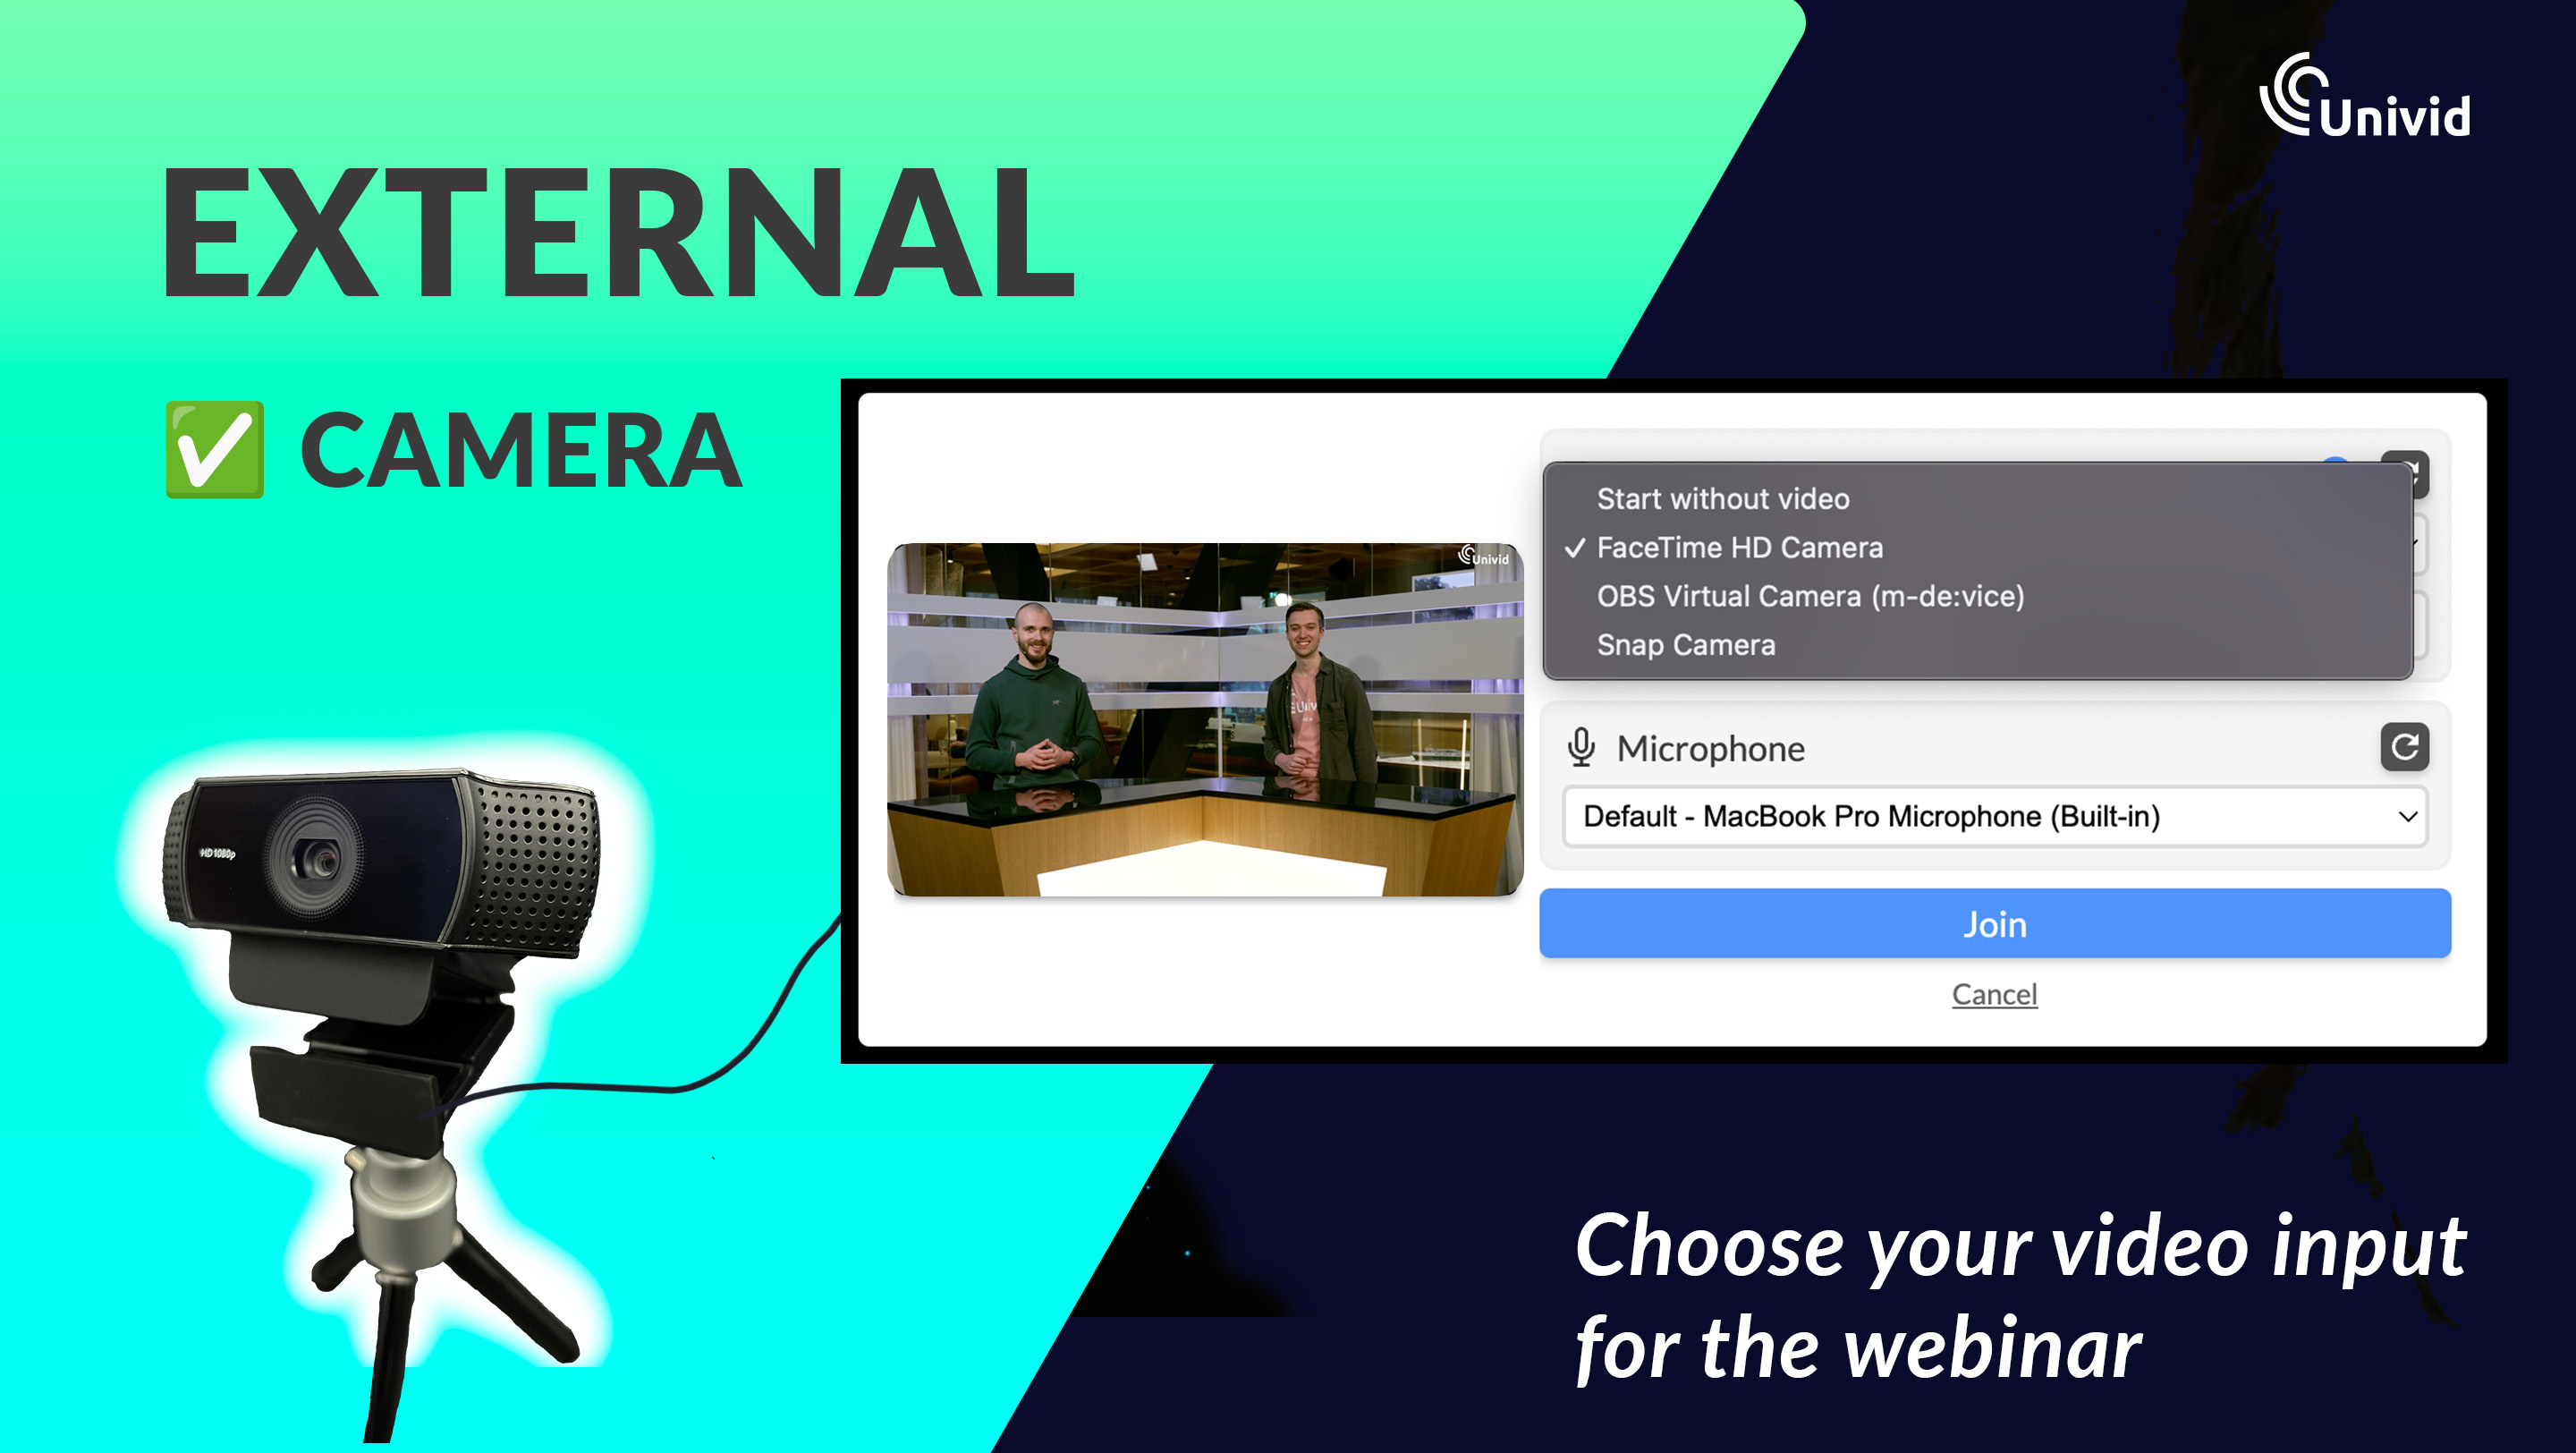
In the Univid webinar studio - you can choose your video input before you enter the studio, or simply change it once you are inside. Select your external camera in the dropdown.

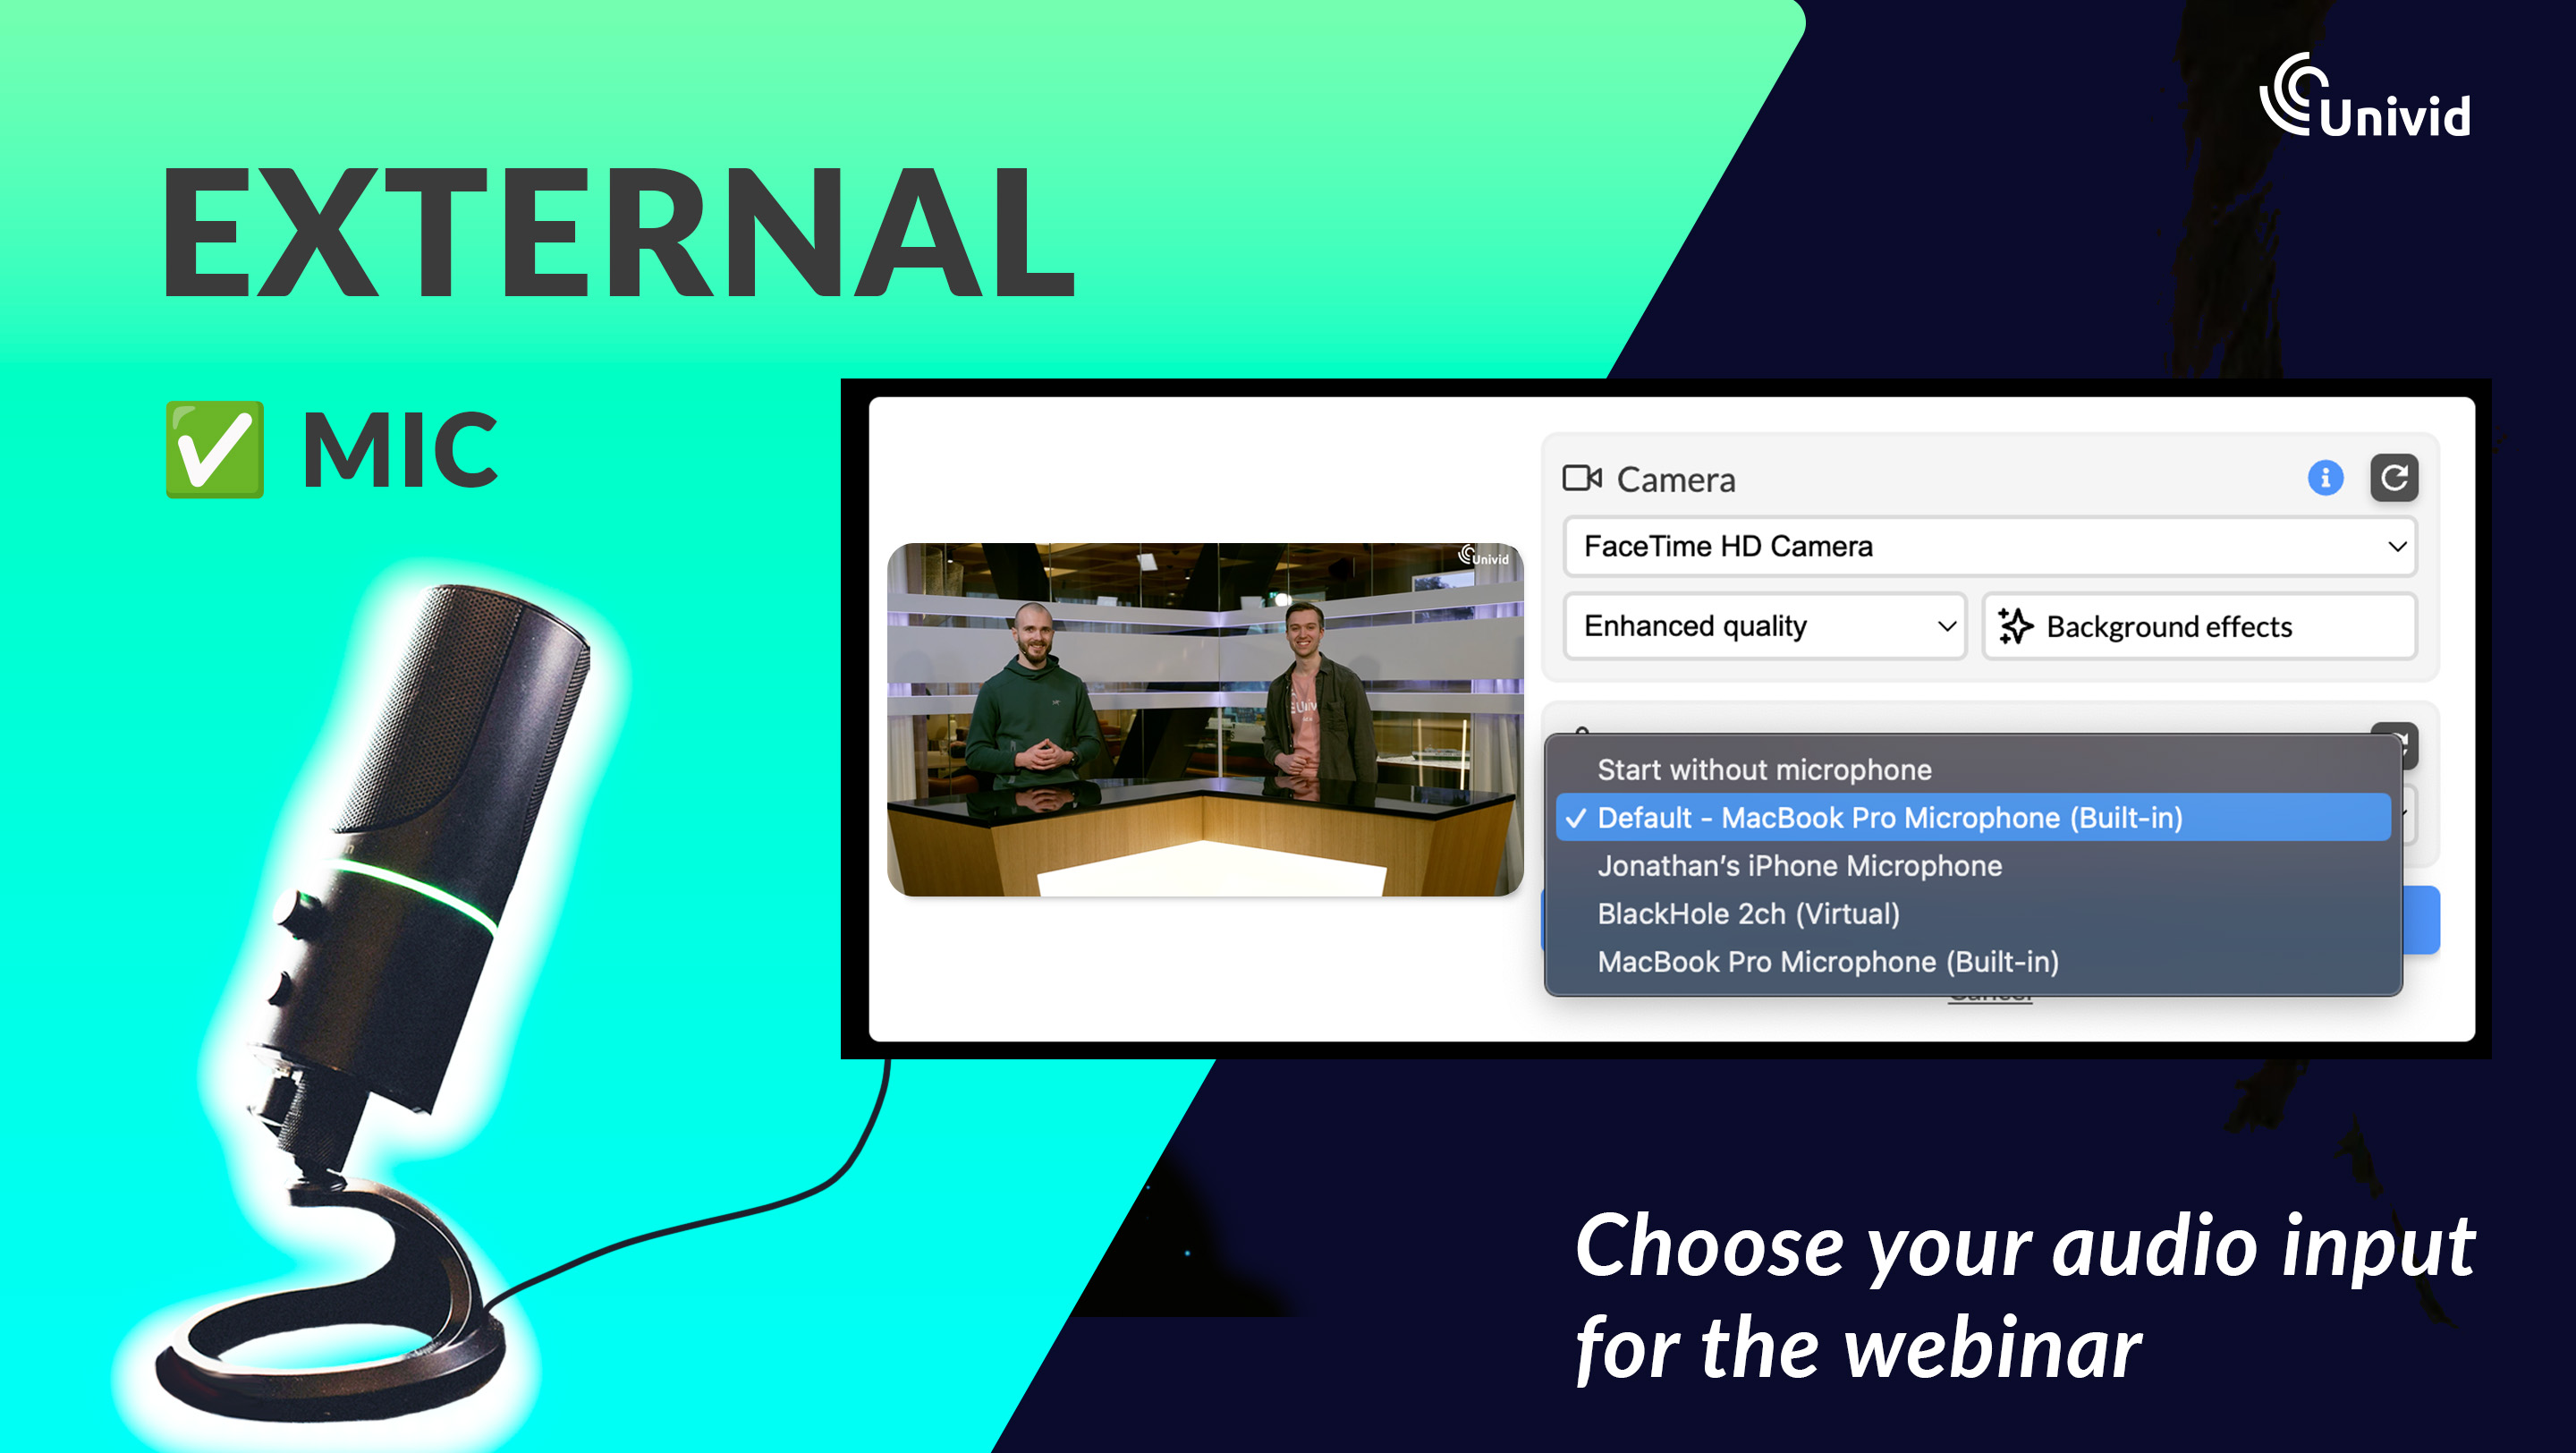
You can select your audio input in a similar fashion - simply choose from the dropdown before entering the webinar studio.

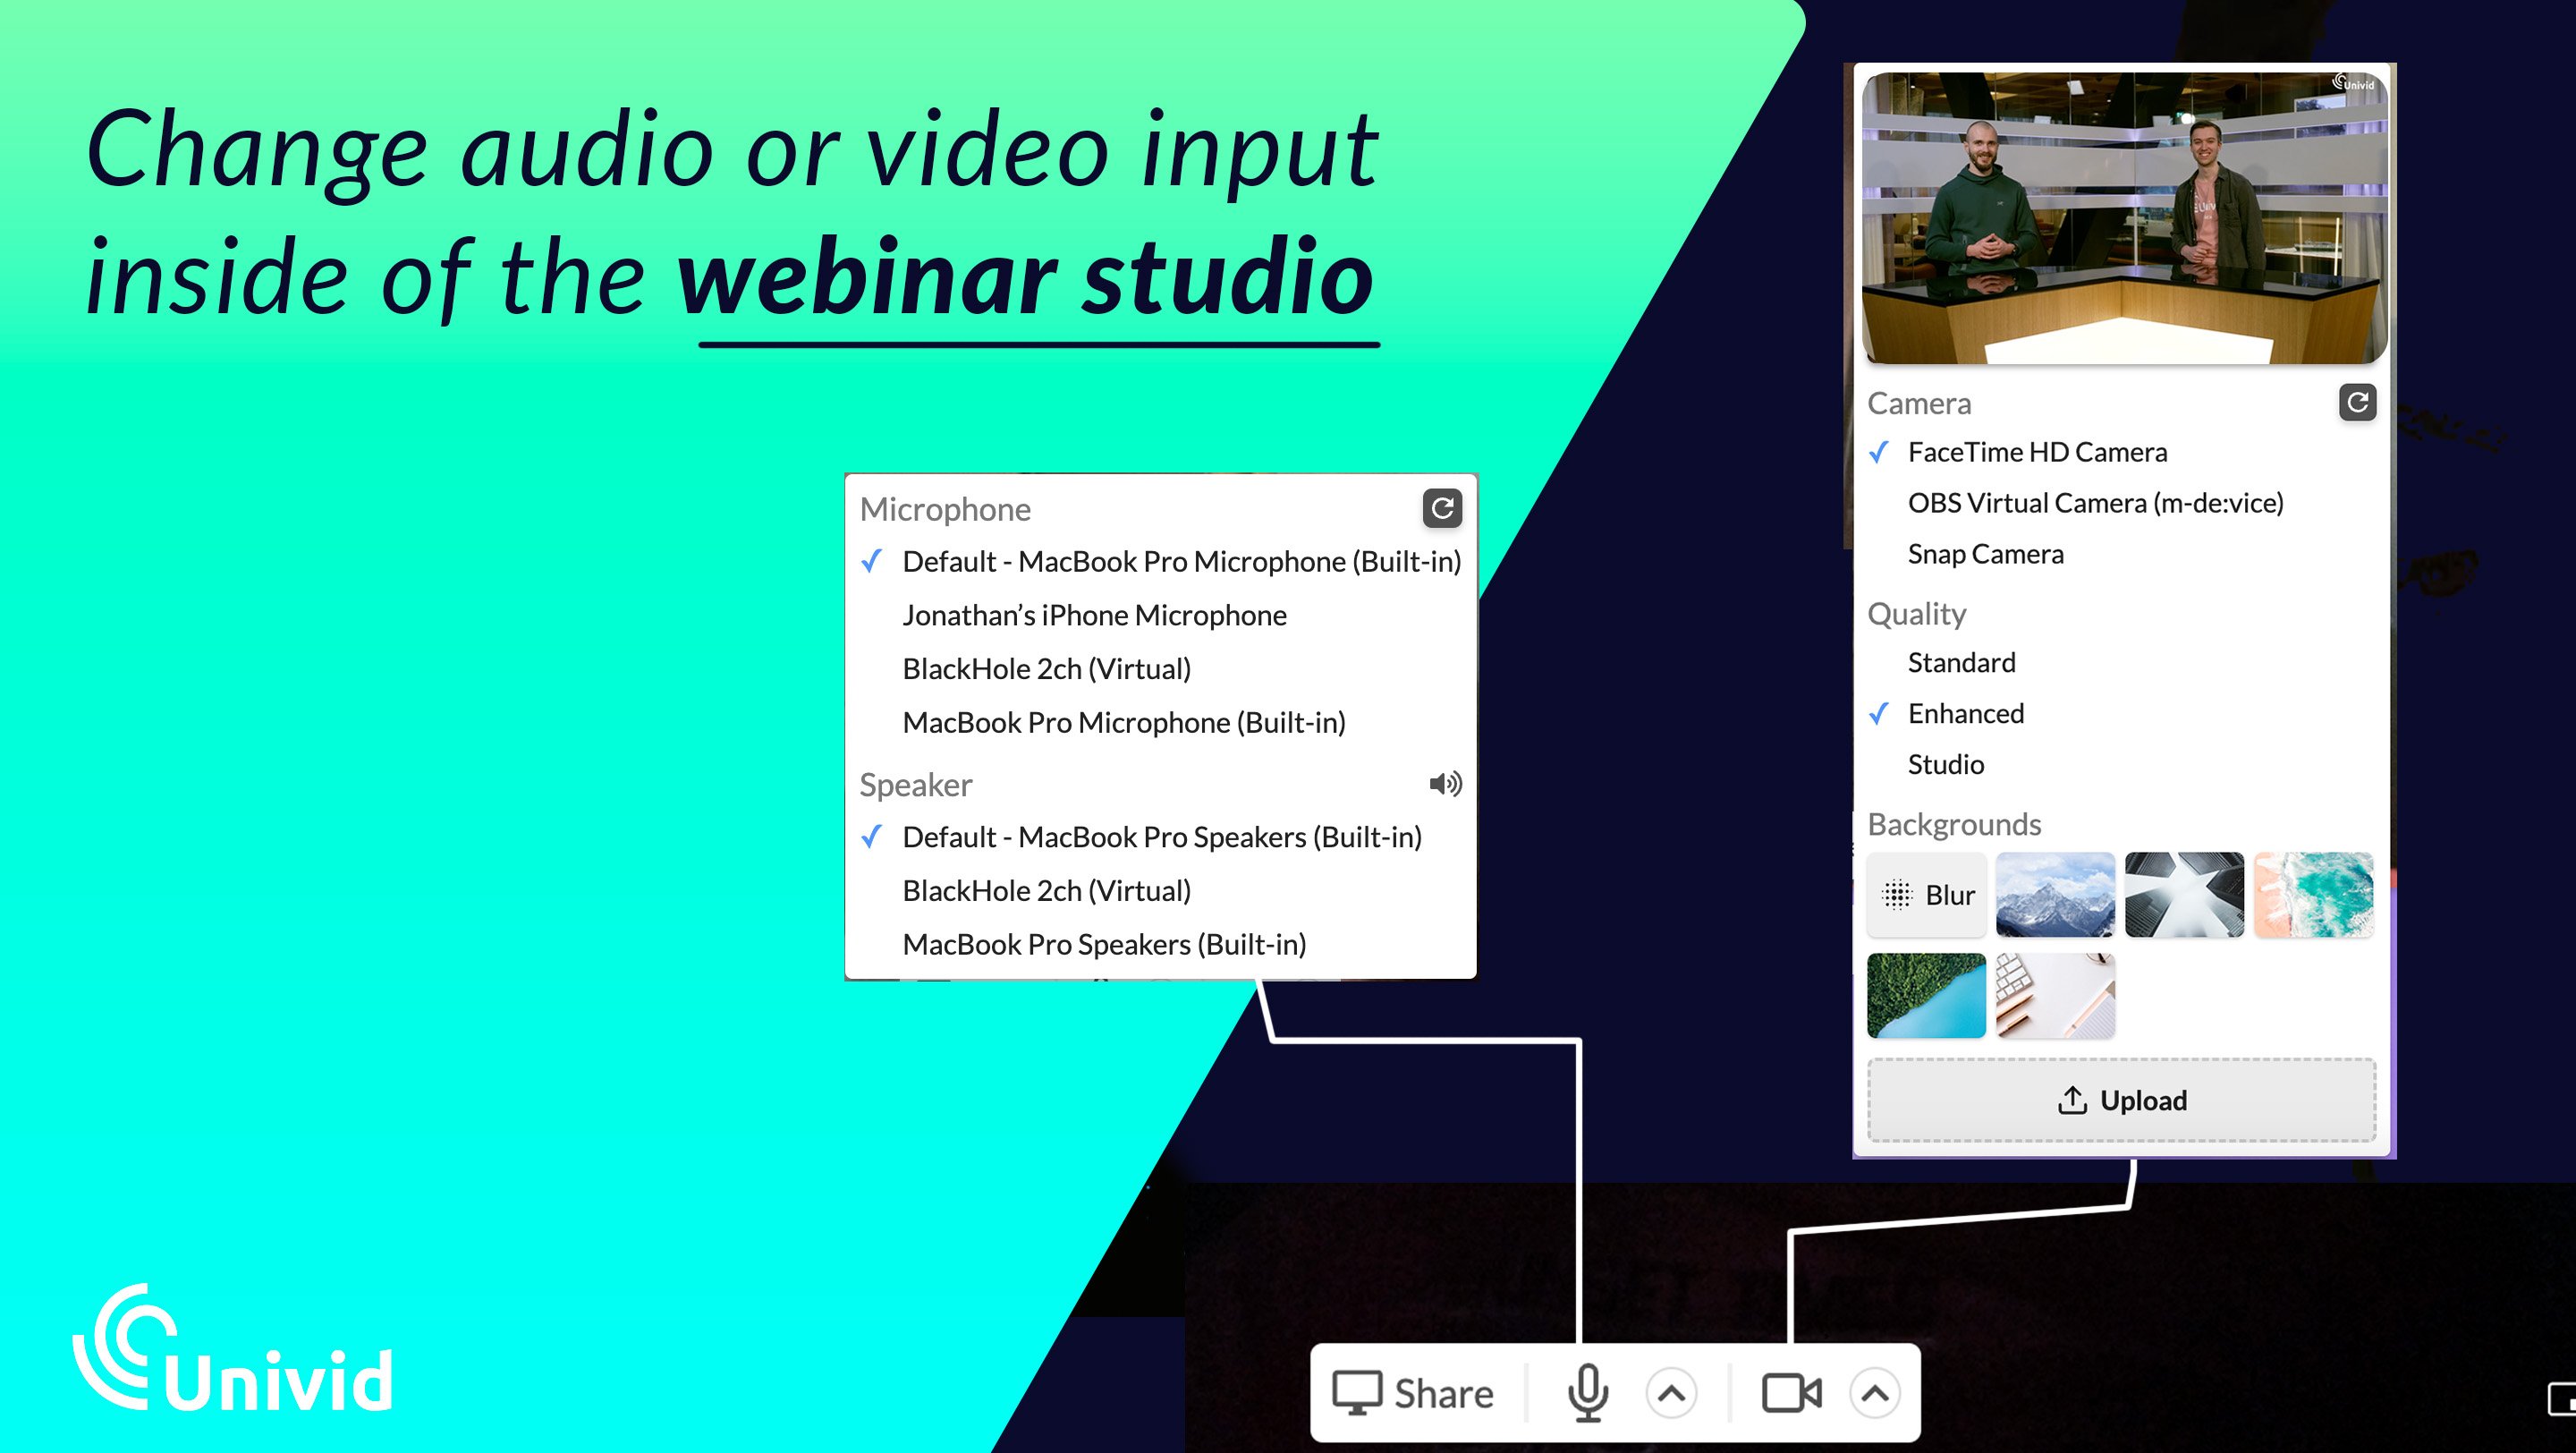
Also, if you are already in the webinar studio, either before or after you decide to go live - you can still change both the video and audio input. Just press the camera or microphone icons in the bottom bar and select the new source.

4. Test Your Setup
Before going live, it’s important to test your setup - so everything works as expected.
Start a test webinar to ensure your external camera and microphone are working correctly.
Adjust the camera angle, lighting, and microphone position for optimal quality.
Test the audio levels to ensure clear sound without distortion or background noise.
Why Use External Video and Audio Inputs?
Using external video and audio inputs can improve your webinar in several ways:
Higher Quality: External cameras and microphones often provide superior video and audio quality compared to built-in options.
Professional Setup: A professional setup can enhance your credibility and audience engagement.
Flexibility: External devices offer more control and flexibility in terms of positioning and adjustments.
