Drive traffic to an already hosted webinar - Upload the recording
Everytime you go live with Univid, a recording will start. Everytime you stop the broadcast, the recording will stop. Yes, everytime. This recording will be available to upload to the same link. Follow the guide below to learn how to upload a recording.
Innehåll
Prerequisites
Make sure that you can access the session you want to upload a recording on, a co-worker might need to invite you to the session (to invite a co-worker see B.2 Invite your team in the guide Configure a Univid session)
Have gone live atleast once on the session
Not within the Univid studio or started a meeting
Upload recording

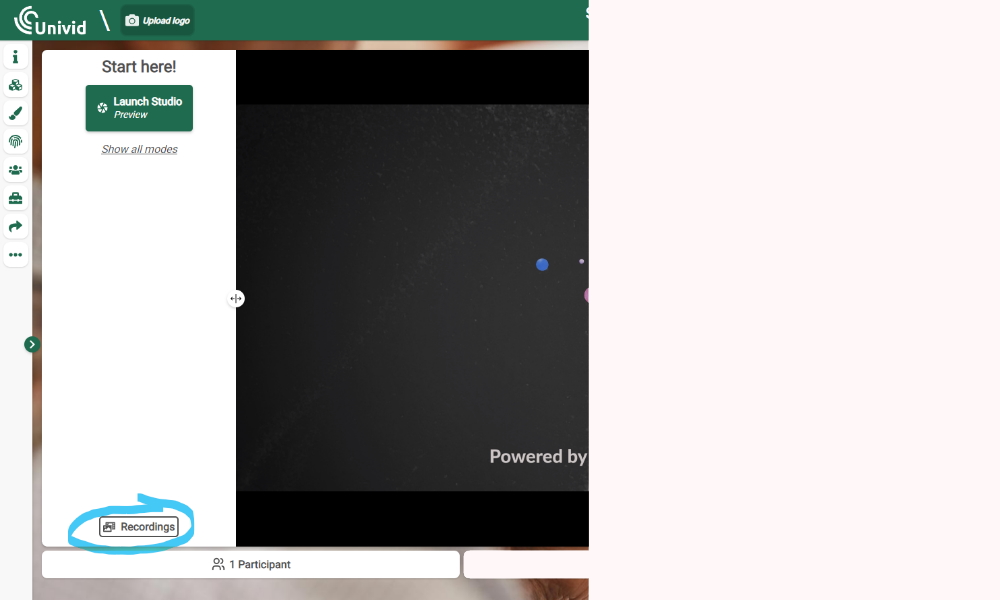
Press Recordings, which can be found "above the participant counter". Make sure to not be in a studio/meeting.

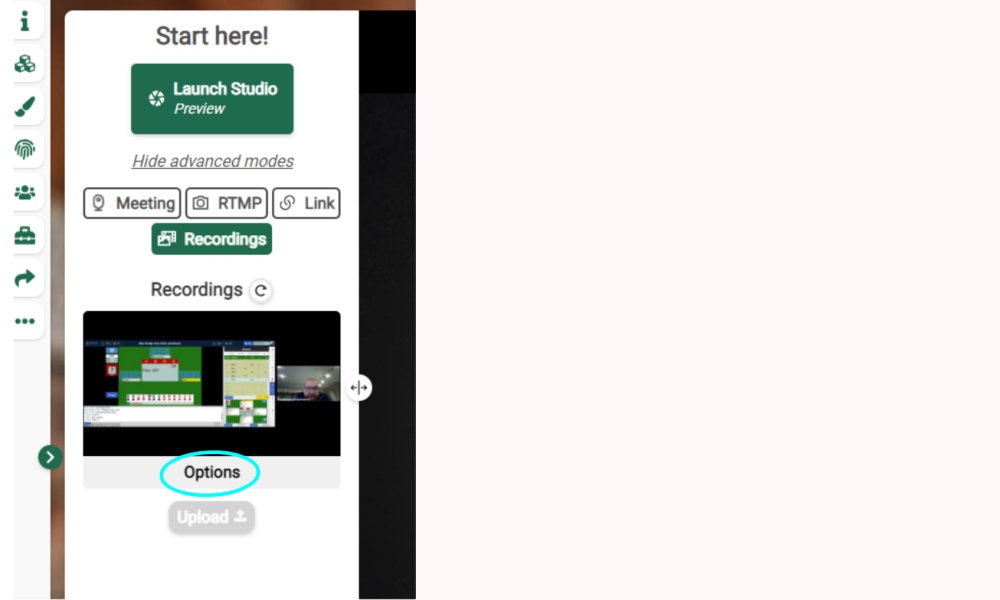
Press Options on the recording you wish to upload, then note how a dropdown menu appears. A recording will be created every time you go live while being in the Univid studio, this recording will appear here once the broadcast is ended within the studio.

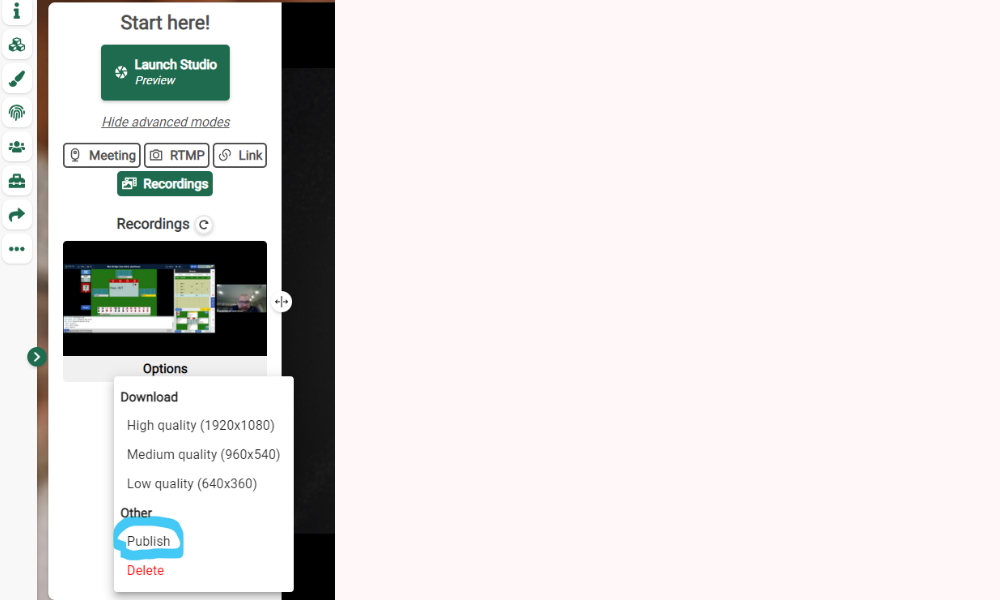
In the dropdown menu. Press Publish to upload your recording. It is also possible to download the recording for further editing or usage in other channels.
Well done
The recording is now able to be seen upon entering the Univid session link (the same link that has been shared with attendees that were welcome to watch the webinar/broadcast live).
Unpublishing a recording in Univid

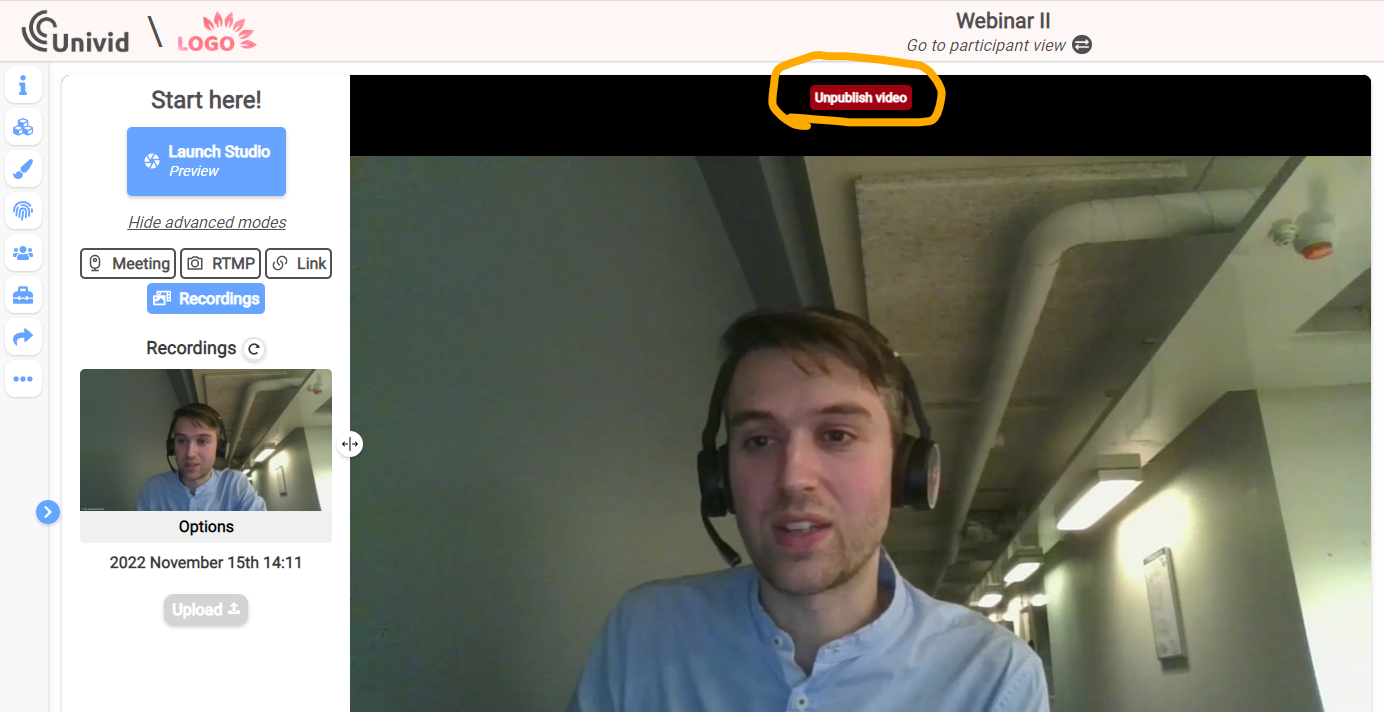
Note that as an administrator of a Univid session you are able to unpublish the recording by pressing Unpublish found slightly below the title of the Univid session. This will not delete the recording, it will still be available in the list of recordings - where you published the recording in the first place.
