Setup Univid and Go Live in 60 seconds
In this quick guide, you will be ready to go live for an audience in 60 seconds. It is normal to set up a session ahead of time before going live. But to be ready to go live within 60 seconds demonstrates how easy it is to configure an upcoming webinar/live broadcast in Univid.
Innehåll
Log in
Make sure you are logged in with a "master account" if you only have access to a regular account, make sure to consult the coworker who has been in touch with the Univid team or email us at Univid.
Create a session
You will now be following Jonathan's illustrations on how to create a webinar session. Can you make it faster than him? Get started at: https://app.univid.io
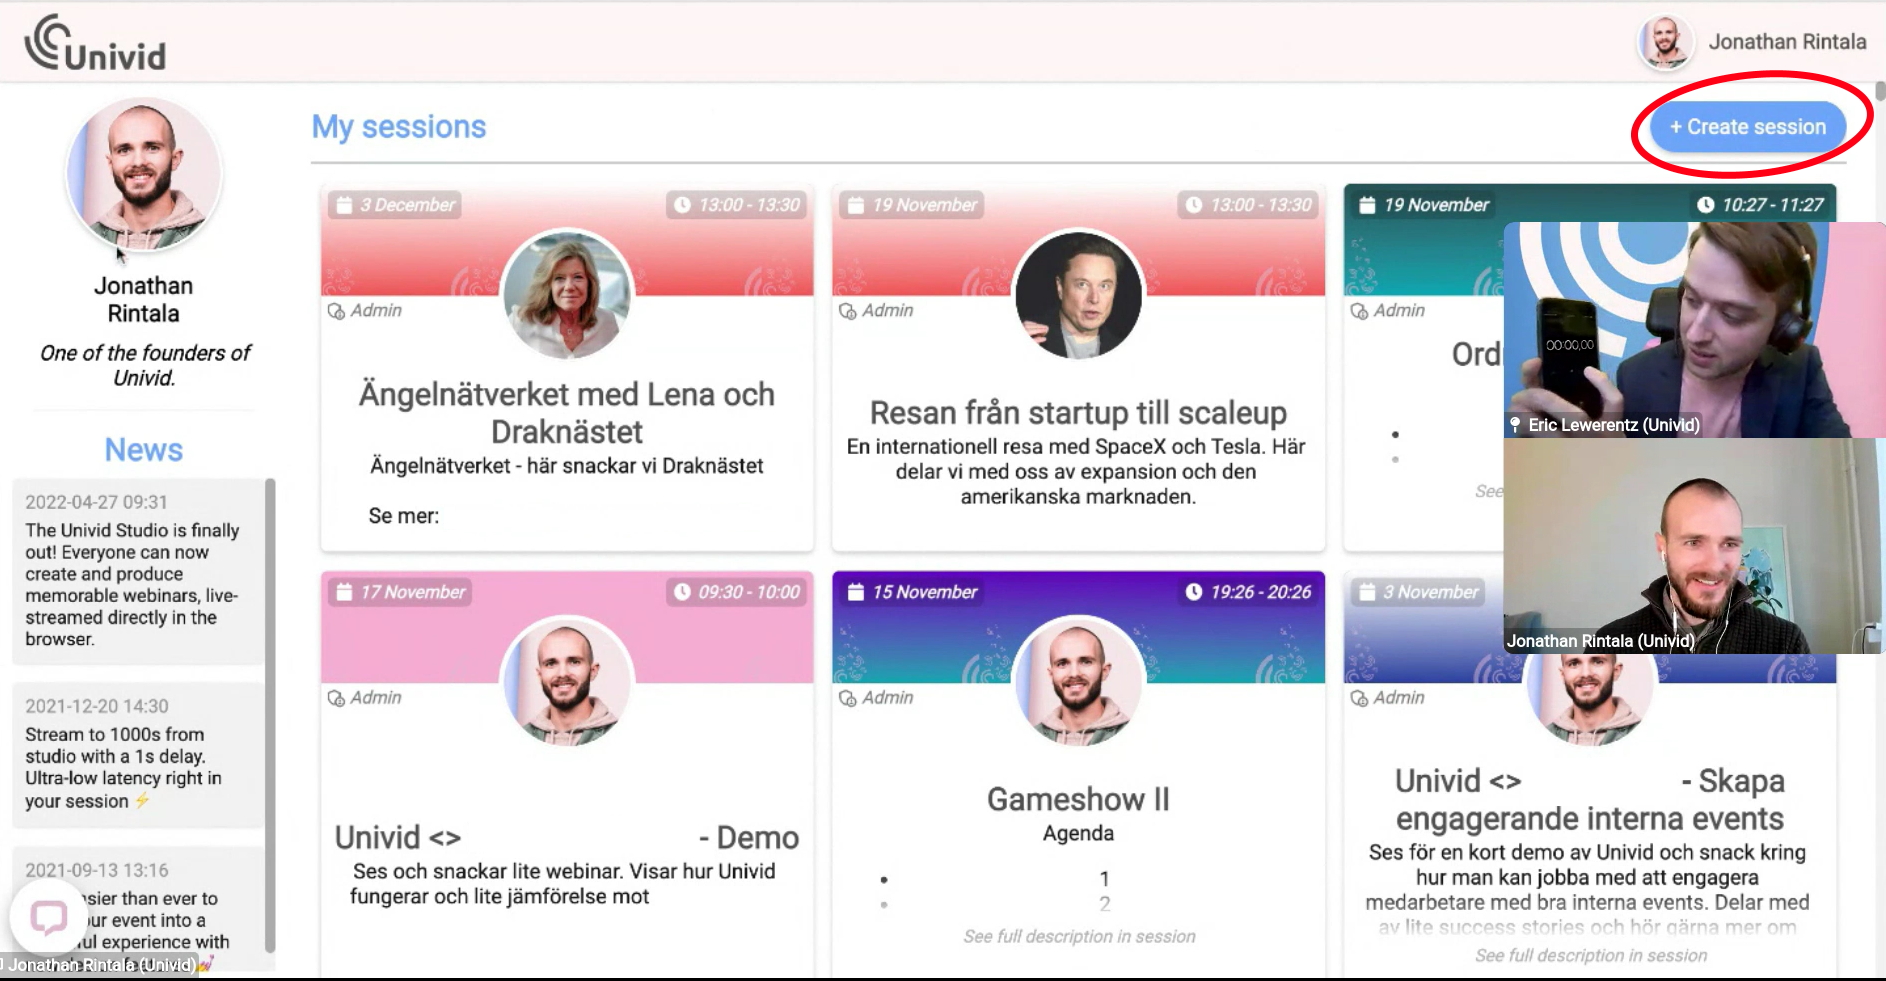
Image 1: Press the Create Session button in the top right corner. Now the timer has started for Jonathan!
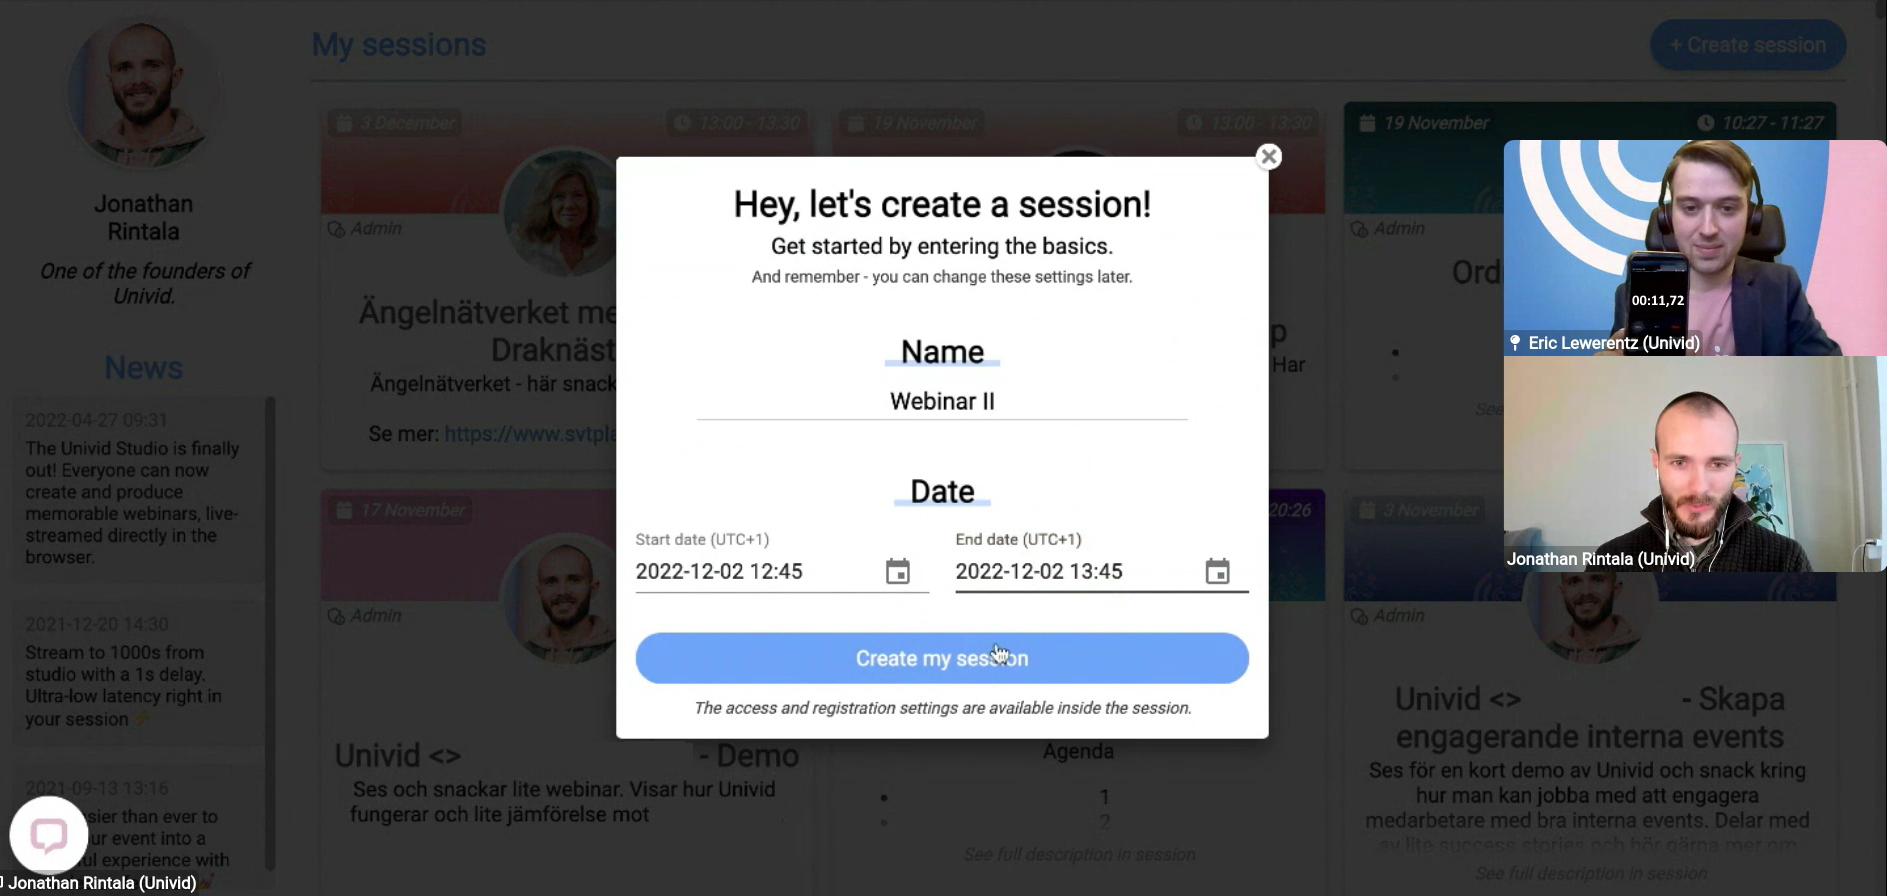
Image 2: You can now choose the name and start time and end time of the session. Don't worry, you are able to edit this later on.
The Univid session
You have now created a session, while there can be a lot to configure, this guide aims at providing a focus on the essentials, enabling you to intuitively understand the other pieces as you go. Don't hesitate to ask the support chat if any question pops up.
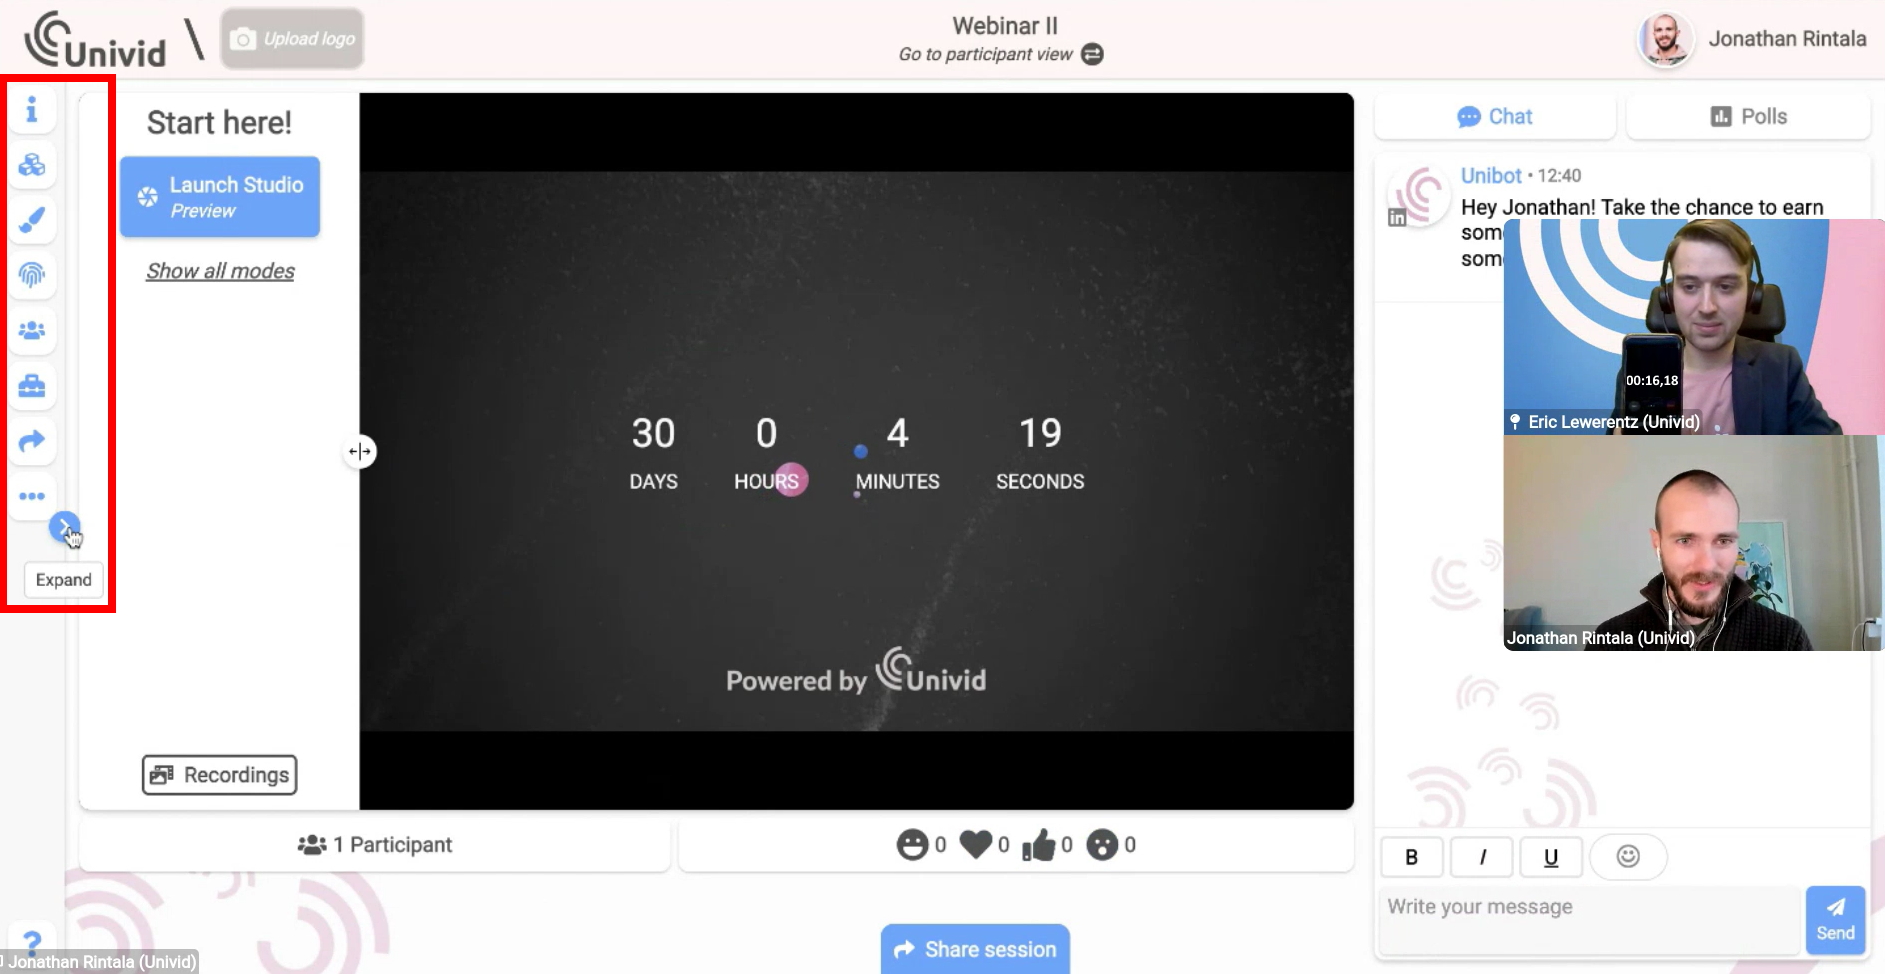
Image 3: A newly created Univid session. You can customize your session in the left-side menu.
Side menu
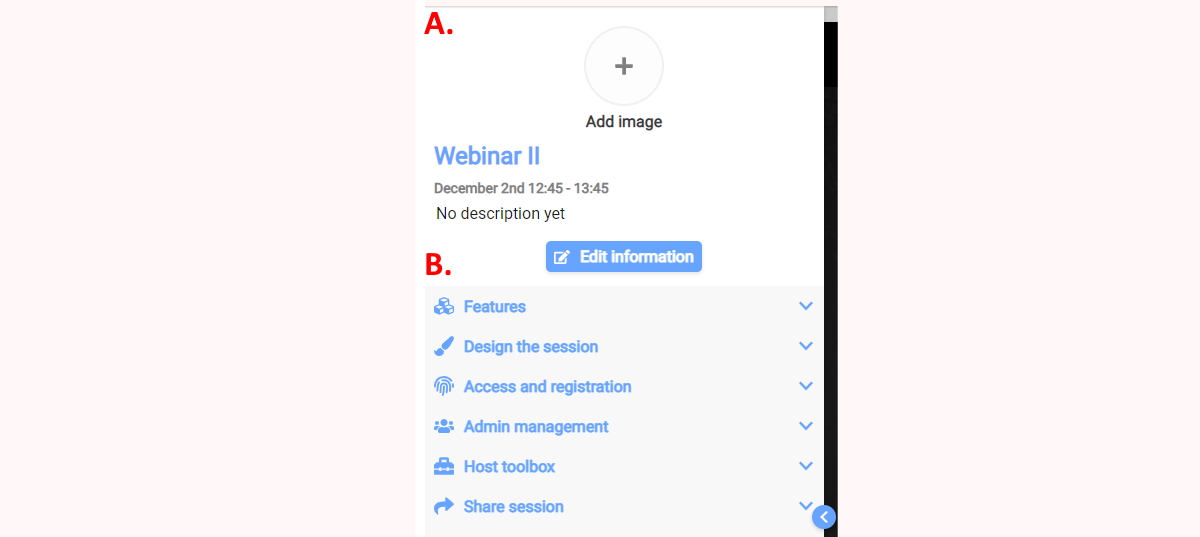
Image 4: Left side menu
Note that you can add and edit the information your audience will see about the webinar in A. In addition, there are possibilities to customize the appearance and what interaction you would like to have by expanding the list of items seen in the image below the letter B in the image shown above.
A. Edit description
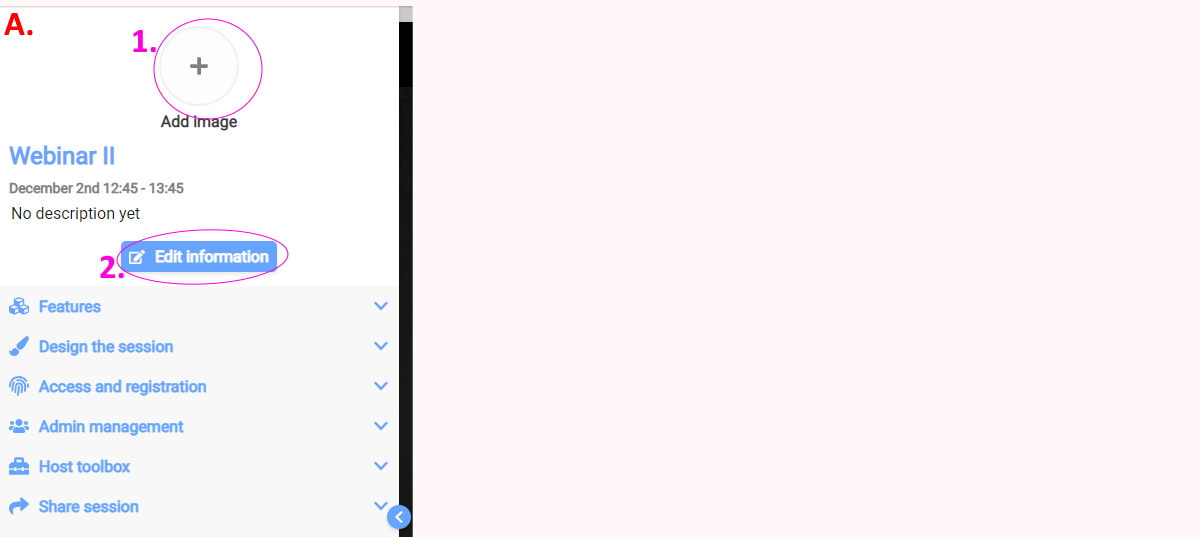
Image 5: Edit description in the left menu
Inform who will be seen while being live.
Edit title, date and description of the session.
B.1 Adapt the look
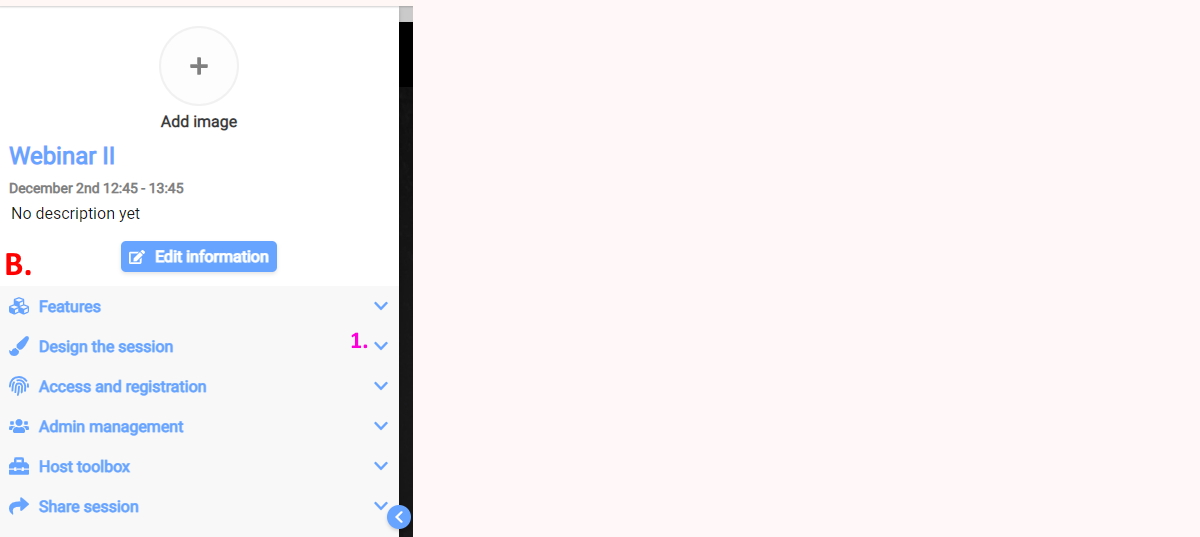
Image 6: You can adapt the look of the session such as the background image and colours of the header and text.
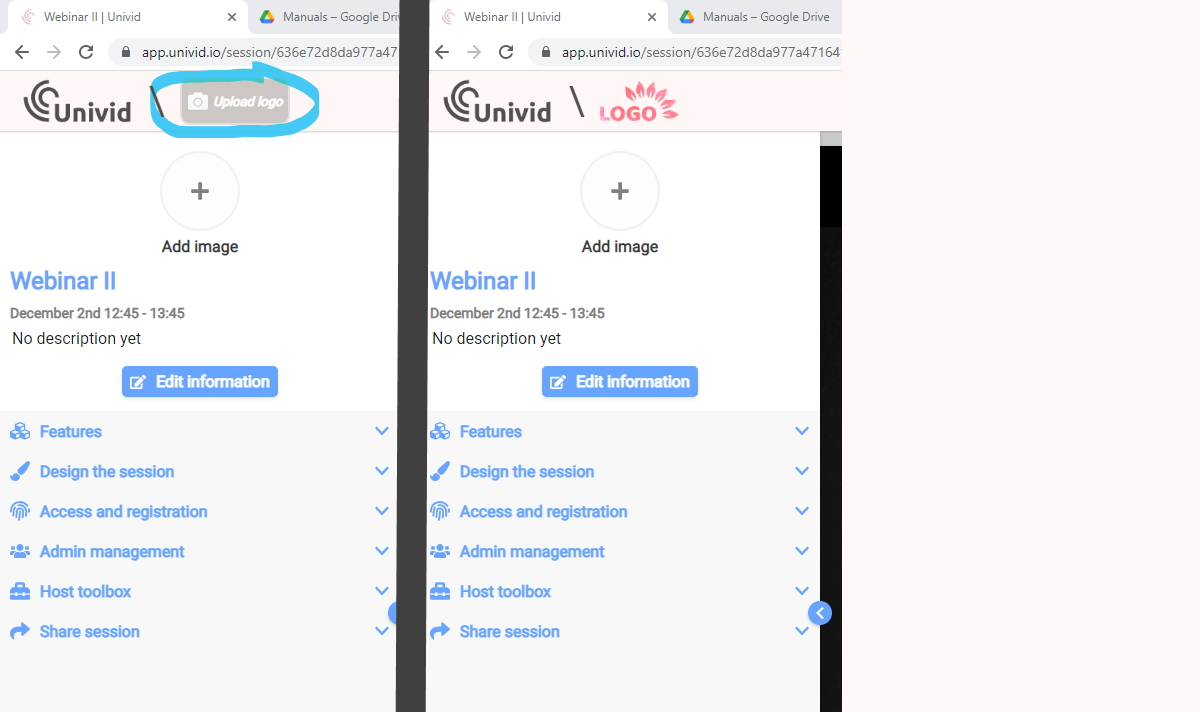
Image 7: Add a logo
You can also edit the logo. See the left side of the image above. To upload, drag and drop the image (or press) the marked "Upload logo" box. See the right side of the image to see the end result!
B.2 Invite your team
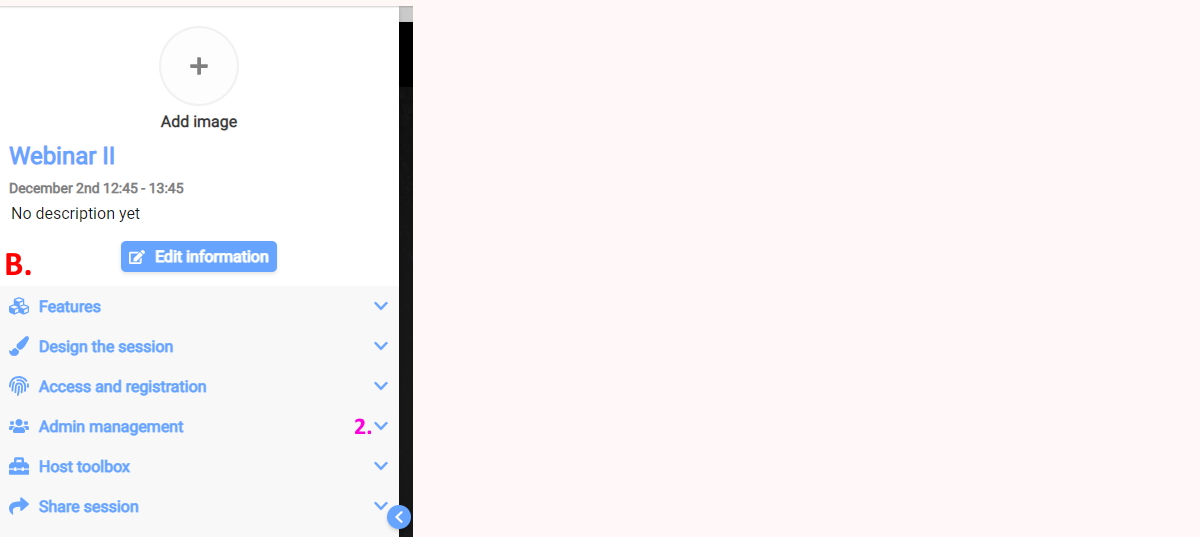
Image 8: Add someone as an admin within the left menu
Invite co-workers to Univid:
Expand the Admin management section.
Press Add +
Now you can either share a link or add it by writing in their already existing Univid account. This procedure works for any Univid account which is registered via email. The link is easy to share with co-workers who do not already have an account or using trial accounts.
OBS: this link is only for co-workers/guest speakers. Or any person supposed to be part of the production of a webinar/live broadcast.
Spread the word!
Now you are almost done. All that is left is to decide if you want to allow participants to participate in the session anonymously or by registering. Once it is done the final step is to let the world know about that you are about to go live by sharing the link.
Optional: Registration form and reminders
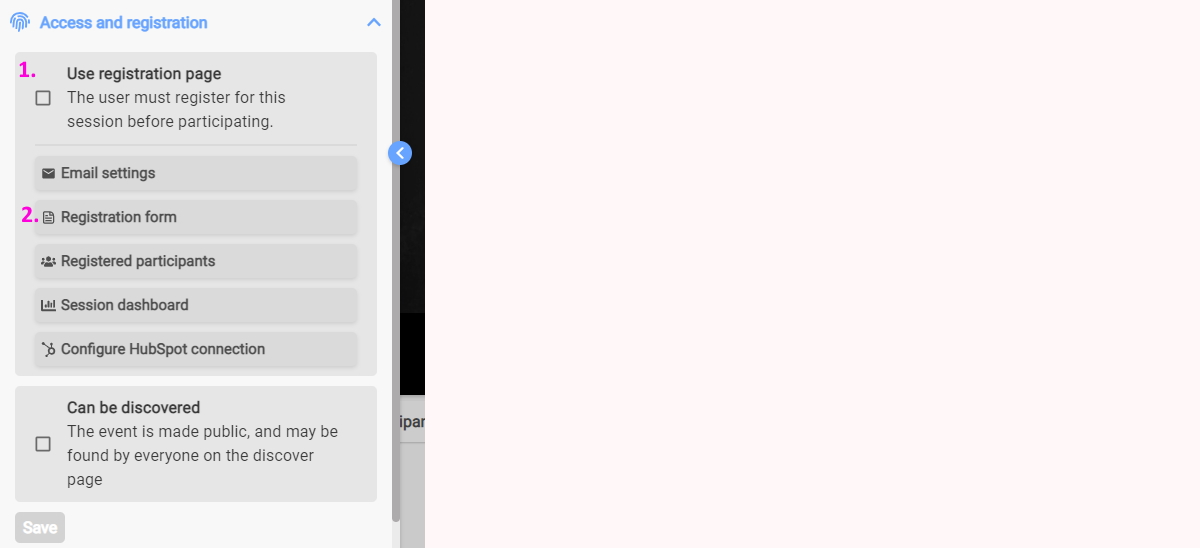
Image 9: Manage registrations within the left menu
In the Access and registration section, you can enable a registration form (1. in the image above), and you can also configure what information you would like to receive from registrants (2. in the image above).
You can also tick the Can be discovered. Univid will then showcase our upcoming session on the Univid discover feed.
Reminders
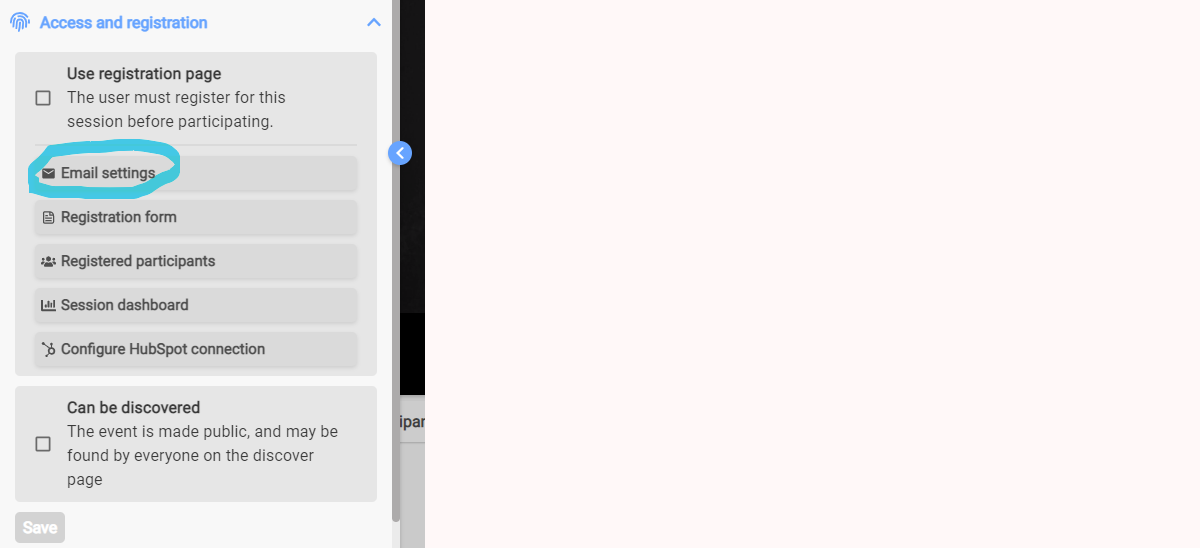
Image 10: Manage reminders
Remember to enable reminders, it is a great way to create awareness for invited participants who have not already added the webinar to their calendar in a previous email sent from Univid.
A fun part of email settings is press preview. This enables you to see the design of the email reminders directly, it automatically adapts based on the design made in B.1 Adapt the look.
Let participants join
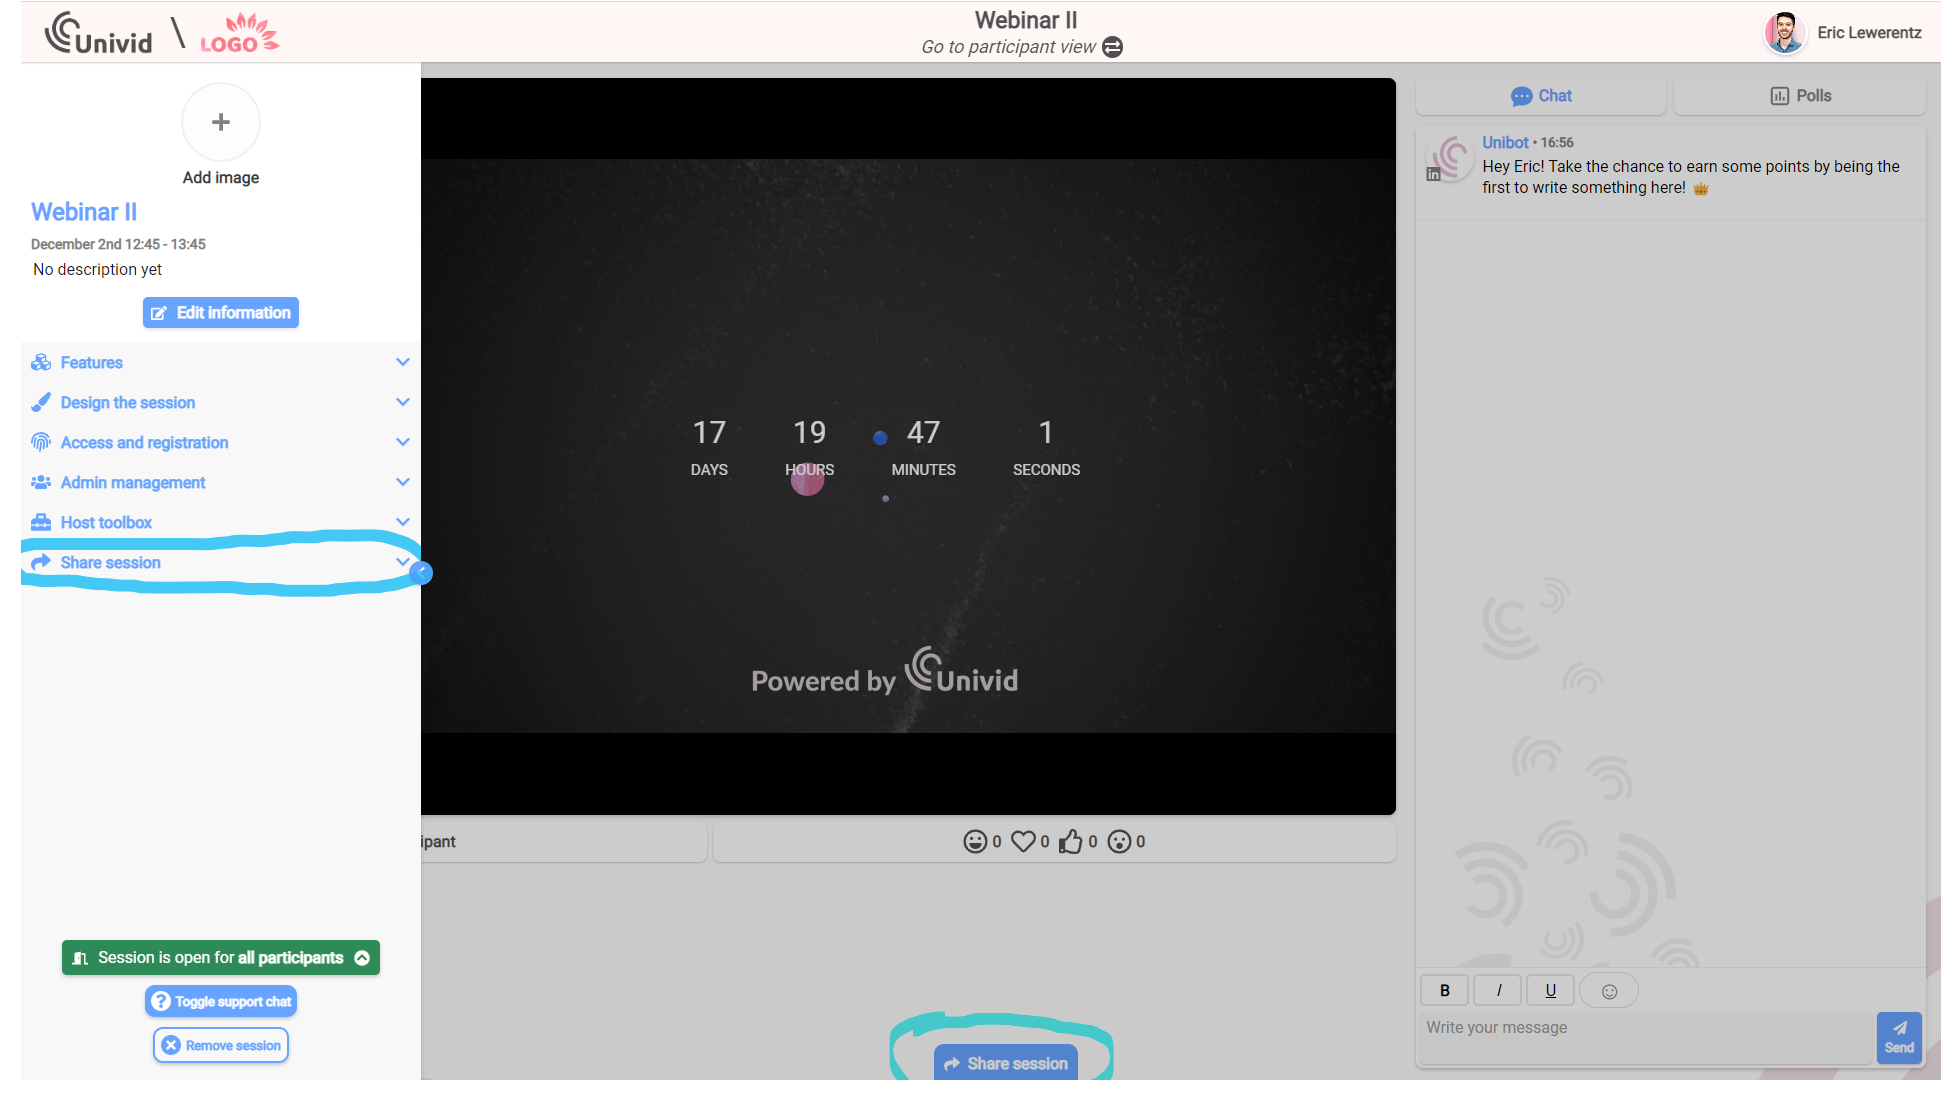
Image 11: Note the two share session buttons, this will give a link which you can share with anyone you would like to join as a participant.
There are two easy ways to share a session in Univid, either use the button available in the center bottom of the screen. Or the Share session list item in the left menu.
Choose your preferred way to share the link, either copy the link and paste it to your desired channel. Or perhaps press the email button to get the link inserted into an email draft.
Success!

Image 12: Example of a session with customized appearance, a tip is to match the layout with not only your brand but also with the topic or theme for the presentation.
You have now set up a Univid session and done the minimum essentials for an exceptional webinar. Can you be faster than Jonathan proceeding with the setup steps within 59 seconds and 220 milliseconds??
Given that you have prepared any optional image assets for your session we believe you have the capabilities to be faster than Jonathan, let us summarize the steps carried out in this guide:
Creating a session
A description and show who will be speaking
Adapted the look of the session
Invited co-workers or guest speakers
Setup a registration
Chosen reminders
Shared the public link for registering/attending the session
Please check out https://univid.io/help-center/host-check-list-creating-webinar for quick quality assurance that no essential activity has been forgotten during the setup step.
